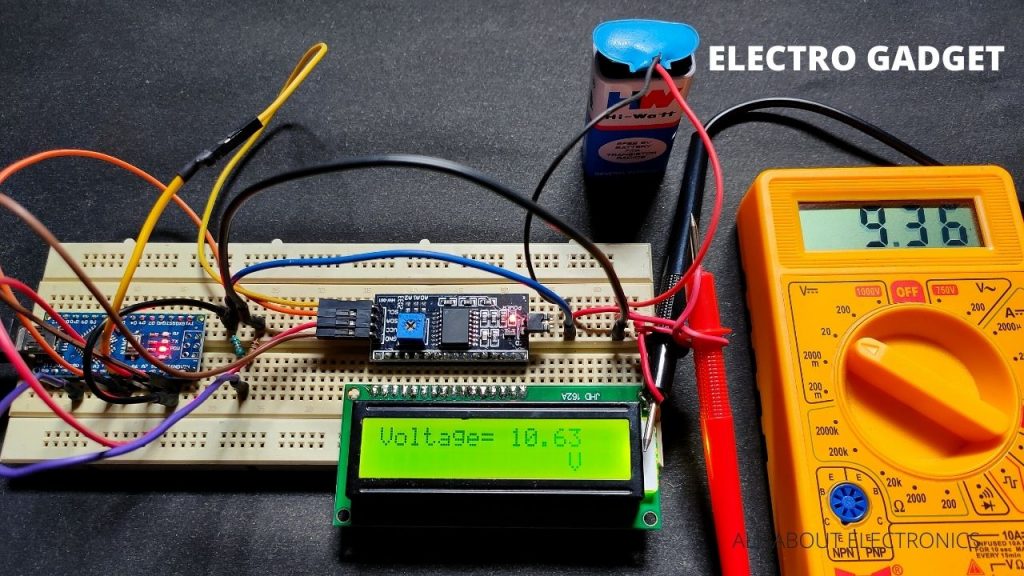
In this project, an Arduino Digital Voltmeter circuit that can measure voltages up to 50V is designed. A Voltmeter or a Voltage Meter is a measuring instrument that is utilized for measuring voltage or potential difference between two focuses in a circuit. Voltmeters are a significant bit of equipment that is related to any sort of electronics project. They are utilized in the measurement of both AC and DC voltages.
Voltmeters are again ordered into two sorts namely Digital Voltmeter and Analog Voltmeter. Analog Voltmeter comprises of pointer that moves across a scale and the movement is corresponding to the voltage measured.
Analog Voltmeter is additionally classified as dependent on their standard of construction. A portion of the ordinarily known Analog voltmeter is Permanent Magnet Moving Coil Voltmeter, Rectifier Type Voltmeter, Electrostatic Type Voltmeter, Moving Iron Type Voltmeter, and so on.
Analog Voltmeter generally has an error level of 5% and the parallax error is frequently an issue. Be that as it may, an Analog voltmeter can be utilized to measure extending from not many volts to a few thousand volts.
To conquer the deformities of the Analog voltmeter, Digital Voltmeter is presented in electronics. In contrast to Analog voltmeters, which scale and a pointer to show the deliberate voltage, digital voltmeters directly show the deliberate voltage numerical on a computerized display.
The level of error in digital voltmeters is generally under 1% and the accuracy can be expanded in precision digital voltmeters with rapid estimation and choice of storing the value in memory.
Must Read Arduino Projects
Project
Circuit Diagram
Components Required
- Arduino
- 16 x 2 LCD Display
- 10KΩ Potentiometer
- 100KΩ Resistor
- 10KΩ Resistor
- Connecting Wires
About Parts of Arduino Digital Voltmeter
Arduino

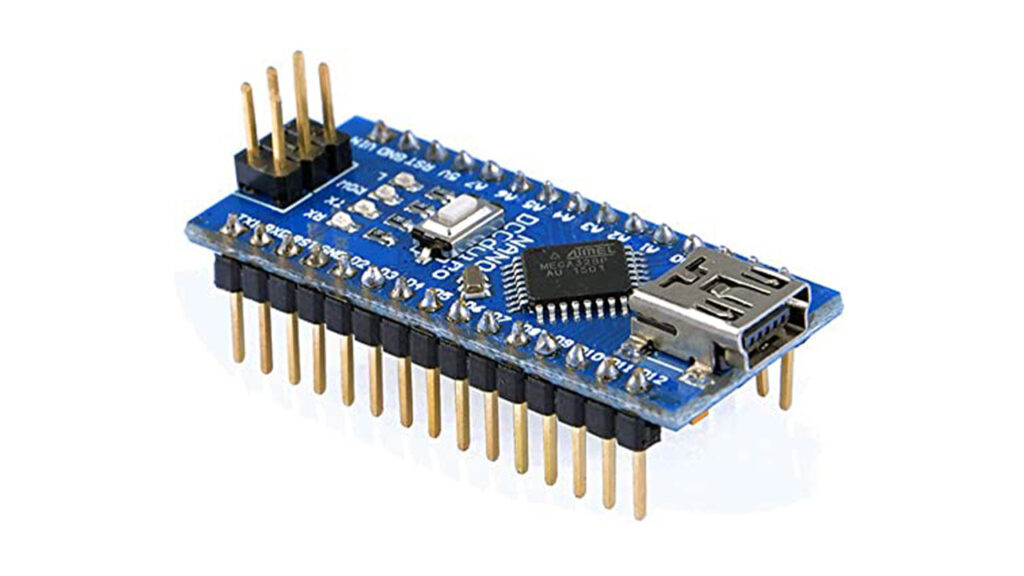
Arduino is one of the most popular electronics prototyping boards based on the ATmega328P Microcontroller. ATmega328P is an AVR architecture-based 8-bit microcontroller. Here I am using Arduino NANO for this project.
16×2 LCD Display

A 16 x 2 LCD display is the most commonly used display unit for microcontroller-based applications. It supports 16 characters in a row with two such rows. It also supports special characters and even custom characters.
I2C LCD Display Module

I2C Module has an inbuilt PCF8574 I2C chip that converts I2C serial data to parallel data for the 16 pins LCD display. It is currently available with a default I2C address of either 0x27 or 0x3F. With this I2C LCD module, we can able to show data via only 2 wires which are SDA and SCL pins.
Must Read Arduino Based Wattmeter
Circuit Connection of Arduino Digital Voltmeter
For measuring voltages less than or equal to 5V, the first circuit can be used. For measuring voltages up to 50V, the second circuit can be used. The LCD to I2C Module part in both circuits is the same.
Without I2C Module
Pin 1 and pin 2 of the LCD power supply pins for display. They are connected to ground and +5V supply respectively. Pin 3 of the LCD is the contrast adjust pin of the display. It is connected to the wiper terminal of the 10KΩ potentiometer while the other terminals of the potentiometer are connected to +5V supply and ground respectively.
The next three pins of the LCD are control pins. Pin 4 and pin 6 of the LCD are connected to digital input/output pin 2 and pin 3 of the Arduino respectively. Pin 5 of the LCD is connected to the ground.
The next connections are with respect to data pins. The LCD is used in 4-bit data mode and hence data pins D4 to D7 are used. Connect pin 11 to pin 14 of the LCD is connected to digital input/output pin 4 to pin 7 of the Arduino. Pin 15 and pin 16 are the supply pins of the backlight LEDs. Pin 15 of the LCD is connected to a +5V supply through a current limiting resistor of 220Ω. Pin 16 of the LCD is connected to the ground.
In the first circuit, which is used to measure voltages up to 5V, there are no additional connections and the voltage to be measured is connected directly to the Analog input pin A0 of the Arduino.
In the second circuit, which is used to measure voltages up to 50V, we need to connect a voltage circuit additionally. The output of the voltage divider circuit consisting of a 100KΩ resistor and 10KΩ resistor is connected to the Analog input pin A0 of the Arduino with another end of the 100KΩ resistor connected to the voltage to be measured and the other end of the 10KΩ resistor connected to the ground.
The ground terminal of the input voltage is to be measured and Arduino must be common.
With I2C Module
By using the I2C module the circuit connection is too easy for an LCD display. There is a total of 16 pins for connecting the LCD display and I2C module and 4 input pins for connecting the I2C module and Arduino. The 4 pins are SCL, SDA, VCC and GND.
Working Principle of Arduino Digital Voltmeter
In this project, the components which are required and the construction of the project are too simple. The work of the project is explained below.
In the digital voltmeter, the voltages to be measured, which are in Analog form, are converted to digital form with the help of Analog to Digital Converter (ADC). Hence, the ADC feature of the Arduino is utilized in this project.
In the first circuit, which is used to measure a maximum voltage of 5V, the input voltage is given to the Analog input pin of the Arduino. The reference voltage of the ADC is 5V. The ADC in Arduino UNO is of 10-bit resolution. Hence, the input voltage is calculated by multiplying the Analog value at the Analog pin by 5 and dividing the value by 210 i.e. 1024.
The range of voltages for Arduino’s Analog input is 0V to 5V. Hence, to increase this range, a voltage divider circuit must be used.
In the second circuit, the range of the Analog input of Arduino is increased up to 50V by using a voltage divider consisting of a 100KΩ resistor and 10KΩ resistor. With the help of the voltage divider circuit, the input voltage being measured is brought down to the range of Arduino’s Analog input.
The rest of the calculations are made in the programming part of the Arduino.
R1/R2 > ((50/5) – 1)
R1/R2 > 9
Hence, if we choose R1 as 100KΩ and R2 as 10KΩ, then it is possible to measure the voltages up to 50V.
Disadvantages of Arduino Digital Voltmeter
- The disadvantage of using a voltage divider-based voltmeter is the error of measurement. Hence, we need multiple ranges of a voltmeter.
- In order to reduce the error, the ratio of R1 and R2 in the voltage divider must be minimum.
- For example, to measure an input voltage of 50V, the ratio of R1 and R2 must be greater than ((50/5) – 1) i.e.
Application of Arduino Digital Voltmeter
- An Arduino-based Digital Voltmeter is designed in this project which can be used to measure different ranges of DC voltages.
- The circuit can be extended to measure even AC voltages with slight modifications in the circuit and code.
Arduino Code
For First Circuit
1 2 3 4 5 6 7 8 9 10 11 12 13 14 15 16 17 18 19 20 21 22 23 24 25 26 27 28 29 30 31 32 33 34 | #include <Wire.h> #include <LiquidCrystal_I2C.h> LiquidCrystal_I2C lcd(0x27, 16, 2); float voltage = 0.0; float V = 0.0; float temp=0.0; int analog_value = 0; void setup() { lcd.init(); lcd.backlight(); lcd.clear(); lcd.print("Arduino Voltage"); lcd.setCursor(6, 1); lcd.print("Meter"); delay(2000); } void loop() { analog_value = analogRead(A0); temp = (analog_value * 5.0) / 1024.0; voltage = temp/(0.0909); if (voltage < 0.1) { voltage=0.0; } lcd.clear(); lcd.setCursor(0, 0); lcd.print("VOLTAGE= "); lcd.print(voltage); lcd.setCursor(14,0); lcd.print("V"); delay(30); } |
For Second Circuit
1 2 3 4 5 6 7 8 9 10 11 12 13 14 15 16 17 18 19 20 21 22 23 24 25 26 27 28 29 30 31 32 33 34 35 36 | #include <Wire.h> #include <LiquidCrystal_I2C.h> LiquidCrystal_I2C lcd(0x27, 16, 2); float voltage = 0.0; float V = 0.0; float R1 = 100000.0; float R2 = 10000.0; float temp=0.0; int analog_value = 0; void setup() { lcd.init(); lcd.backlight(); lcd.clear(); lcd.print("Arduino Voltage"); lcd.setCursor(6, 1); lcd.print("Meter"); delay(2000); } void loop() { analog_value = analogRead(A0); voltage = (analog_value * 5.0) / 1024.0; V = voltage / (R2/(R1+R2)); if (voltage < 0.1) { voltage=0.0; } lcd.clear(); lcd.setCursor(0, 0); lcd.print("VOLTAGE= "); lcd.print(V); lcd.setCursor(14,0); lcd.print("V"); delay(30); } |


Cool project 👍