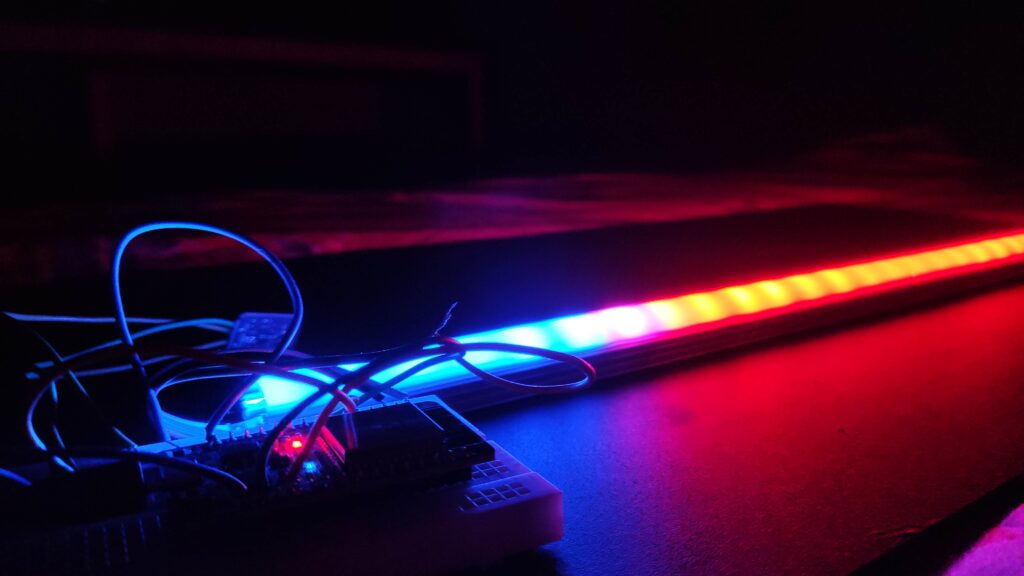
Nowadays RGB LED strips are great for lighting projects. You can make any custom projects using a microcontroller and also without using a microcontroller. In this article, we are going to discuss how to make a WS2812B Music Reactive LED strip by using ESP32 and a sound module. The code is a simple working process using WLED software. You just need to install the bin file into the ESP32 board. We will discuss the process in detail below.
Light up your celebration parties and impress all your invites with these music-reactive multicolour addressable LED lights that respond and change their colour modes on every single beat. This light is nothing but a simple 5050 RGB LED which has an inbuilt addressable data controller i.e., WS2812B chip. You can mount LED strips anywhere in your room and even outdoors. The main purpose of this project is to use it at parties but only not for that. You can also use it for making your room fantastic looks and make your music more interesting. The practical application is endless.
Principle Behind Music Reactive LED Strip
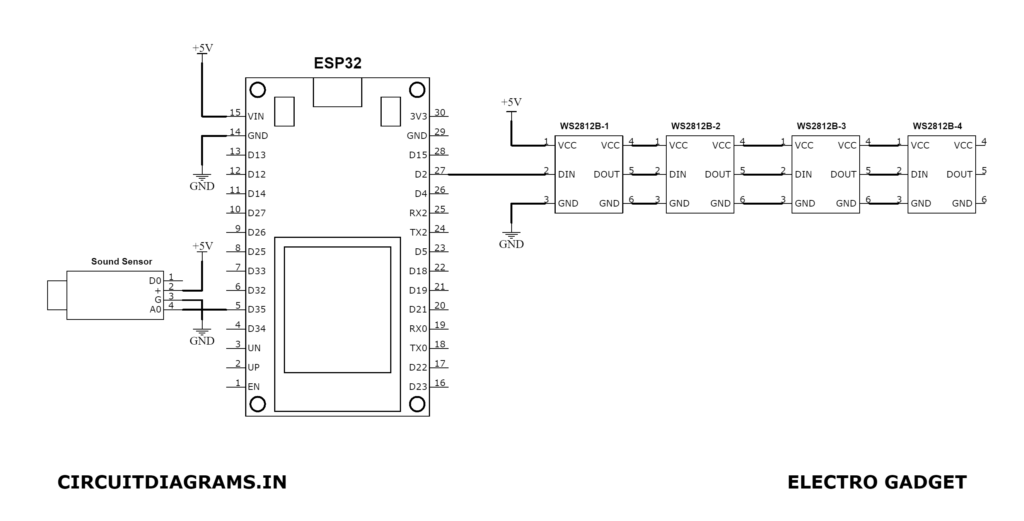
As described above, this project uses an ESP32 development board for sensing the audio signal (D35). After processing it, the output through its digital pin (D2) is given to the data pin of the LED strip. Then drives the LED strips. It uses a 5V/2A (max) power supply to power both the strip and ESP32 development board. An advantage of this project is that it doesn’t use any audio jacks. It uses a high-quality sound sensor module which can receive sounds from an adorable distance and sends the input signal to the ESP32. The entire project can be completed within 30 minutes and requires just two of the basic parts (ESP32 Board & Sound Sensor) that can be found easily. I assure you that you will be really surprised on watching the final result of this project.
Project

Circuit Diagram
Components Required
- ESP32 Development Board
- Sound Sensor Module
- WS2812B Addressable RGB LED Strip
- Wires
Process To Install WLED On ESP32 Board
The first thing we going to do is to open up a web browser and type install.wled.me. At this point, you can plug your ESP32 board into your PC. But make sure the micro USB cord you use does support data transfer.
Next in the drop-down menu, we need to select “sound reactive 0.13.0-b6” and click the install button. Then a pop-up window will appear. From there we need to select COM port (as for me the port is COM4) and hit connect tab and now select “Install WLED SR”. While pressing the install button we need to press the boot button of the ESP32 board and after starting the installation process, we can release the boot button. After finishing the process, a welcome message will appear and then we can close the browser.
After that go to the Wi-Fi connection from your PC and select “WLED-AP” (Default Password=wled123). Once it connects with this network, the homescreen will automatically open in the web browser ( If it doesn’t then type “4.3.2.1”). There you need to click “WIFI SETTINGS” type your Wi-Fi name and password into the blank tab and press “Save & Connect”. After that close the window.
Mobile App for Connecting Music Reactive LED
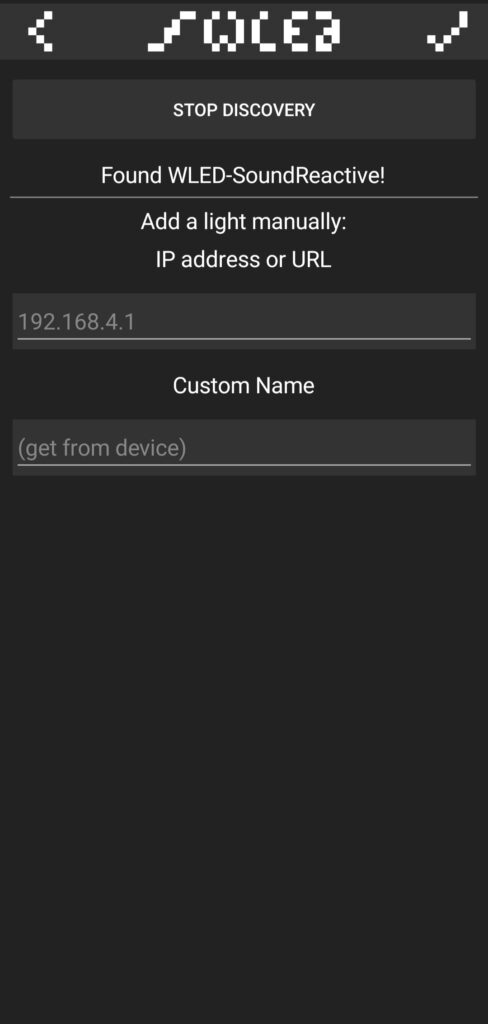
Go to Playstore or Appstore and search “WLED” or click this link to download and install WLED mobile version app (for iPhone WLED). After opening the app, click the “+” icon from the right top corner and press “Discover Lights…” (Make sure your mobile is connected to the same Wi-Fi network as you set your WLED Wi-Fi settings). When the app found any light, just simply press the back icon from the top left corner.

Then click on the light and you will go to the homescreen of the control panel. Now go to the “Config” tab from the top right corner and click “LED Preference” and, define 2000mA as the maximum current and set the number of LEDs you need to show and press save. Back to settings and click on “Sound Settings” and, define the analog output pin as “D35” and press save. That’s it.


How To Control The Music Reactive LED
Go to the homescreen and press the “Effects” tab. From there you can choose any lighting effect. There is a total of 31 music reactive patterns and 142 normal patterns (Without sound reactive). If you want to adjust the sound sensitivity of how much this LED strip will react, will be adjusted from the sensitivity bar of each effect separately. As well as you can change the effect speed, amplification, rate of fall and some more options from the adjustment bar.

Applications of Music Reactive LED
- This project is basically for music party purposes but also can be useful for home decoration.
- We can use it as a music visualizer or music spectrum bar.
