In today’s fast-paced world, effective communication is key. Traditional notice boards, reliant on paper and manual updates, are becoming outdated due to their inefficiency and environmental impact. Enter the Wireless Notice Board—an innovative, eco-friendly solution that uses WiFi technology to display messages instantly via a mobile app or web interface. This project leverages the ESP8266 NodeMCU and MAX7219 Dot Matrix Display to create a modern, web-controlled notice board that’s perfect for schools, offices, or public spaces.
This comprehensive guide will walk you through the process of building a WiFi-Enabled Wireless Notice Board, including the circuit setup, required components, and step-by-step code implementation. Let’s dive into creating a sustainable, tech-driven solution for real-time messaging.
I will recommend you to check out our another IoT Projects.
Why Choose a Wireless Notice Board?
Traditional notice boards waste paper, contributing to deforestation and environmental degradation. With a wireless notice board, you can:
- Save time: Update messages instantly from a mobile app or web dashboard.
- Reduce waste: Eliminate the need for paper-based notices.
- Enhance reliability: Ensure messages are displayed with minimal delay.
- Scalability: Easily expand to multiple displays for larger audiences.
This project combines IoT (Internet of Things) and embedded systems to deliver a practical, eco-friendly communication tool.
Project Overview

The wireless notice board uses the ESP8266 NodeMCU to connect to a WiFi network and host a web server. Users can access a web dashboard via a local IP address to input messages, which are then displayed on a MAX7219 Dot Matrix Display. The system is cost-effective, easy to set up, and customizable for various applications.
Key Features
- Real-time message updates via a web interface.
- Supports scrolling text with customizable speed and direction.
- Modular design for easy replacement of display modules.
- Environmentally friendly, reducing paper usage.
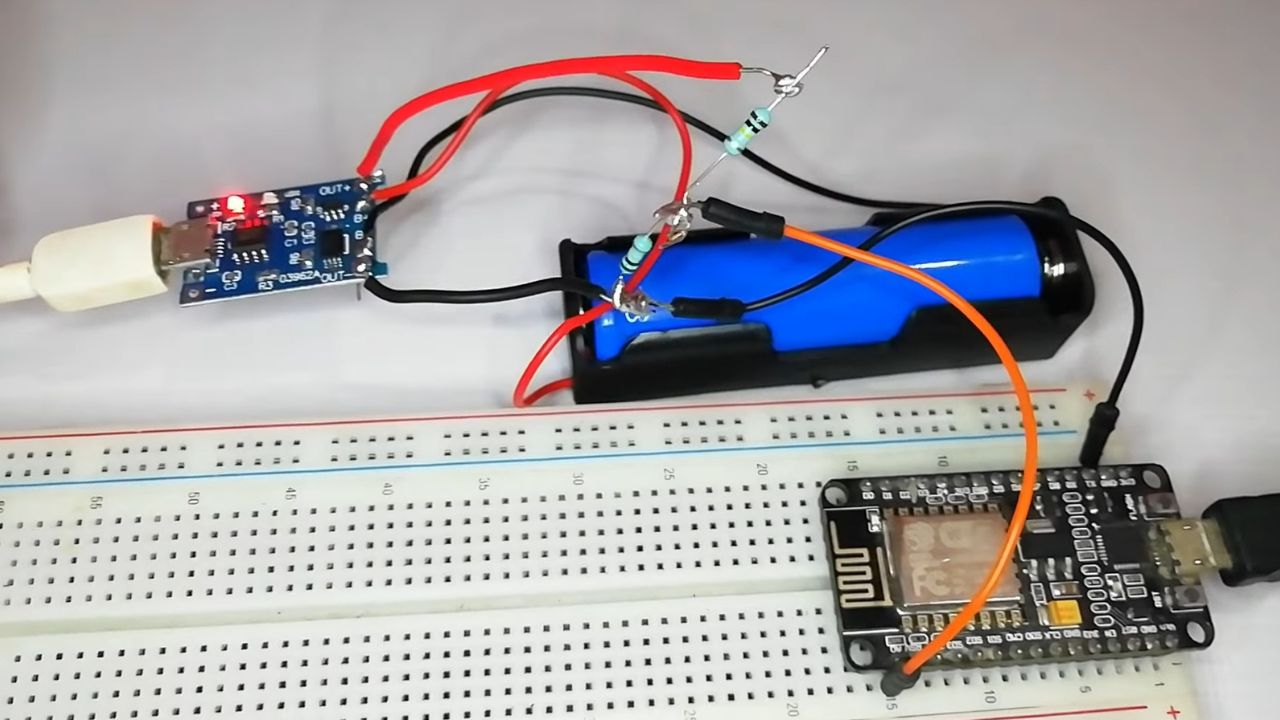
Circuit Diagram

Components Required
To build your wireless notice board, you’ll need the following components:
- ESP8266 NodeMCU Board [https://amzn.to/45pOGUN]
- MAX7219 Dot Matrix Display [https://amzn.to/3Hkk6DN]
- AMS1117 3.3V DC-DC Step-Down Power Supply Module [https://amzn.to/3IZDW7Y]
- Breadboard and Jumper Wires [https://amzn.to/3U17ZOT]
- 5 Volt Power Source [https://amzn.to/3IQT6wa]
Note: Ensure all components are compatible and sourced from reliable vendors to avoid issues during assembly.
Understanding the Components
ESP8266 NodeMCU

The ESP8266 NodeMCU is a low-cost, WiFi-enabled microcontroller ideal for IoT projects. It connects to a WiFi network, hosts a web server, and communicates with the dot matrix display to show messages.
MAX7219 Dot Matrix Display

The MAX7219 Dot Matrix Display is an 8×32 LED matrix comprising four 8×8 modules. Each module uses a MAX7219 driver chip, which simplifies interfacing with microcontrollers by converting serial data into parallel signals for the LEDs. The display supports:
- Multiple colors (single, dual, or RGB).
- Various sizes (5×7, 8×8, 16×16, etc.).
- Modular design for easy replacement if a module fails.
AMS1117 Power Module

The AMS1117 ensures a stable 3.3V supply for the ESP8266 and display, preventing voltage-related issues.
Circuit Connection of Wireless Notice Board
To set up the wireless notice board, follow these connections:
- Dot Matrix Display (Left Side – Input Pins):
- VCC: Connect to 5V pin of power supply.
- GND: Connect to GND pin of power supply.
- DIN: Connect to D7 (GPIO 13) of ESP8266.
- CS: Connect to D8 (GPIO 15) of ESP8266.
- CLK: Connect to D5 (GPIO 14) of ESP8266.
- Power Supply:
- Use the AMS1117 module to provide a stable 3.3V supply to the ESP8266 and display.
- Connect the 5V power source to the breadboard for powering the setup.
- Additional Displays (Optional):
- The right side of the display has output pins to connect additional modules in series.
Tip: Double-check connections to avoid short circuits, and use a breadboard for easy prototyping.
Source Code
The following code enables the ESP8266 NodeMCU to connect to WiFi, host a web server, and display messages on the dot matrix display. You’ll need to install the following Arduino libraries:
- MD_MAX72xx: Controls the MAX7219 display.
- MD_Parola: Manages text scrolling and effects.
Steps to Set Up the Code
- Upload the code to the ESP8266 NodeMCU.
- Install the Arduino IDE and add the ESP8266 board support.
- Install the MD_MAX72xx and MD_Parola libraries via the Arduino Library Manager.
- Update the WiFi credentials (ssid and password) in the code.
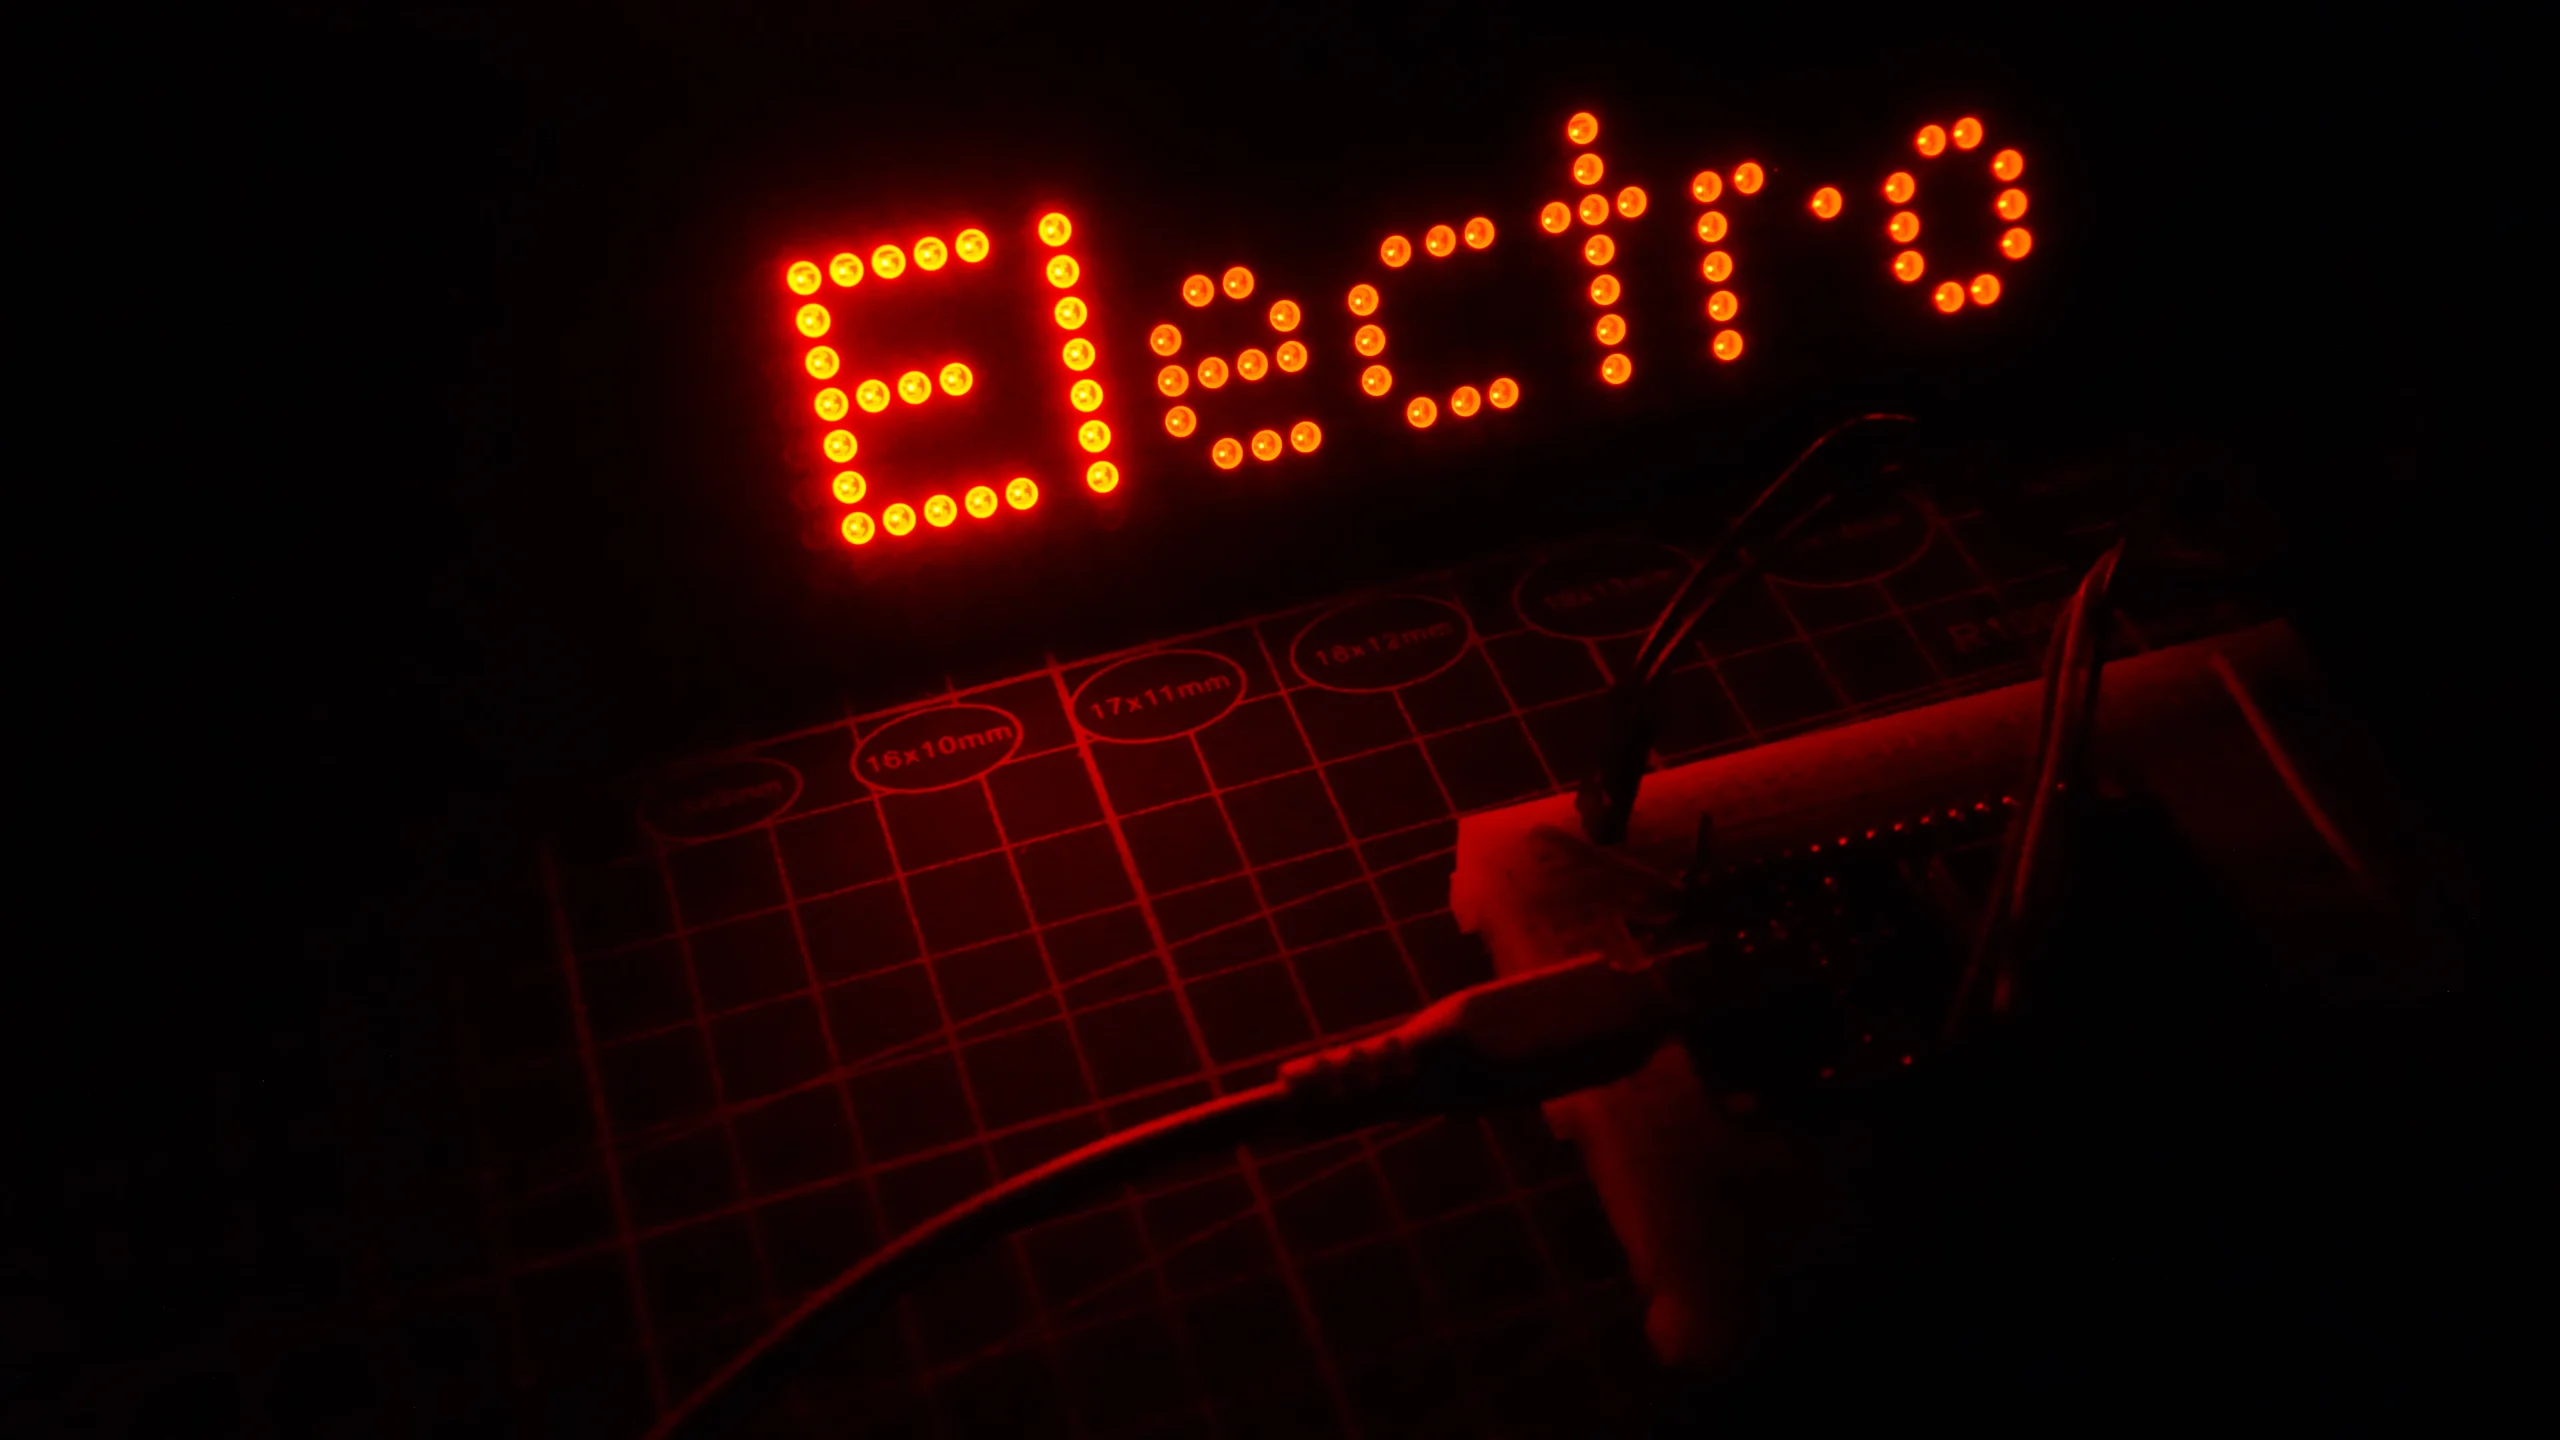
After uploading the code to ESP8266, you can see the IP address on the Dot Matrix Display for entering the webpage.
#include <ESP8266WiFi.h>
#include <MD_Parola.h>
#include <MD_MAX72xx.h>
#include <SPI.h>
// Turn on debug statements to the serial output
#define DEBUG 0
#if DEBUG
#define PRINT(s, x) { Serial.print(F(s)); Serial.print(x); }
#define PRINTS(x) Serial.print(F(x))
#define PRINTX(x) Serial.println(x, HEX)
#else
#define PRINT(s, x)
#define PRINTS(x)
#define PRINTX(x)
#endif
#define HARDWARE_TYPE MD_MAX72XX::FC16_HW
#define MAX_DEVICES 4 //Maximum single module connected
#define CS_PIN 15
// HARDWARE SPI
MD_Parola P = MD_Parola(HARDWARE_TYPE, CS_PIN, MAX_DEVICES);
// WiFi network SSID and Pass
const char* ssid = "**********";
const char* password = "**********";
// WiFi Server object and parameters
WiFiServer server(80);
// Scrolling parameters
uint8_t frameDelay = 25; // default frame delay value
textEffect_t scrollEffect = PA_SCROLL_LEFT;
// Global message buffers shared by Wifi and Scrolling functions
#define BUF_SIZE 512
char curMessage[BUF_SIZE];
char newMessage[BUF_SIZE];
bool newMessageAvailable = false;
const char WebResponse[] = "HTTP/1.1 200 OKnContent-Type: text/htmlnn";
const char WebPage[] =
"<!DOCTYPE html>"
"<html>"
"<center>"
"<head>"
"<title>Electro Gadget</title>"
"<script>"
"strLine = "";"
"function SendData()"
"{"
" nocache = "/&nocache=" + Math.random() * 1000000;"
" var request = new XMLHttpRequest();"
" strLine = "&MSG=" + document.getElementById("data_form").Message.value;"
" strLine = strLine + "/&SD=" + document.getElementById("data_form").ScrollType.value;"
" strLine = strLine + "/&I=" + document.getElementById("data_form").Invert.value;"
" strLine = strLine + "/&SP=" + document.getElementById("data_form").Speed.value;"
" request.open("GET", strLine + nocache, false);"
" request.send(null);"
"}"
"</script>"
"</head>"
"<body>"
"<p><font size="6"><b>Wireless Notice Board</b></font></p>"
"<form id="data_form" name="frmText">"
"<label><font size="4"><b>Type Your Message</b></font><br><input type="text" name="Message" maxlength="255"></label>"
"<br><br>"
"<input type = "radio" name = "Invert" value = "0" checked> Normal"
"<input type = "radio" name = "Invert" value = "1"> Inverse"
"<br>"
"<input type = "radio" name = "ScrollType" value = "L" checked> Left Scroll"
"<input type = "radio" name = "ScrollType" value = "R"> Right Scroll"
"<br><br>"
"<label>Speed<br>Fast<input type="range" name="Speed"min="10" max="200">Slow"
"<br>"
"</form>"
"<br>"
"<input type="submit" value="Send Data" onclick="SendData()">"
"</body>"
"</html>";
const char *err2Str(wl_status_t code)
{
switch (code)
{
case WL_IDLE_STATUS: return ("IDLE"); break; // WiFi is in process of changing between statuses
case WL_NO_SSID_AVAIL: return ("NO_SSID_AVAIL"); break; // case configured SSID cannot be reached
case WL_CONNECTED: return ("CONNECTED"); break; // successful connection is established
case WL_CONNECT_FAILED: return ("CONNECT_FAILED"); break; // password is incorrect
case WL_DISCONNECTED: return ("CONNECT_FAILED"); break; // module is not configured in station mode
default: return ("??");
}
}
uint8_t htoi(char c)
{
c = toupper(c);
if ((c >= '0') && (c <= '9')) return (c - '0');
if ((c >= 'A') && (c <= 'F')) return (c - 'A' + 0xa);
return (0);
}
void getData(char *szMesg, uint16_t len)
// Message may contain data for:
// New text (/&MSG=)
// Scroll direction (/&SD=)
// Invert (/&I=)
// Speed (/&SP=)
{
char *pStart, *pEnd; // pointer to start and end of text
// check text message
pStart = strstr(szMesg, "/&MSG=");
if (pStart != NULL)
{
char *psz = newMessage;
pStart += 6; // skip to start of data
pEnd = strstr(pStart, "/&");
if (pEnd != NULL)
{
while (pStart != pEnd)
{
if ((*pStart == '%') && isxdigit(*(pStart + 1)))
{
// replace %xx hex code with the ASCII character
char c = 0;
pStart++;
c += (htoi(*pStart++) << 4);
c += htoi(*pStart++);
*psz++ = c;
}
else
*psz++ = *pStart++;
}
*psz = '�'; // terminate the string
newMessageAvailable = (strlen(newMessage) != 0);
PRINT("nNew Msg: ", newMessage);
}
}
// check scroll direction
pStart = strstr(szMesg, "/&SD=");
if (pStart != NULL)
{
pStart += 5; // skip to start of data
PRINT("nScroll direction: ", *pStart);
scrollEffect = (*pStart == 'R' ? PA_SCROLL_RIGHT : PA_SCROLL_LEFT);
P.setTextEffect(scrollEffect, scrollEffect);
P.displayReset();
}
// check invert
pStart = strstr(szMesg, "/&I=");
if (pStart != NULL)
{
pStart += 4; // skip to start of data
PRINT("nInvert mode: ", *pStart);
P.setInvert(*pStart == '1');
}
// check speed
pStart = strstr(szMesg, "/&SP=");
if (pStart != NULL)
{
pStart += 5; // skip to start of data
int16_t speed = atoi(pStart);
PRINT("nSpeed: ", P.getSpeed());
P.setSpeed(speed);
frameDelay = speed;
}
}
void handleWiFi(void)
{
static enum { S_IDLE, S_WAIT_CONN, S_READ, S_EXTRACT, S_RESPONSE, S_DISCONN } state = S_IDLE;
static char szBuf[1024];
static uint16_t idxBuf = 0;
static WiFiClient client;
static uint32_t timeStart;
switch (state)
{
case S_IDLE: // initialise
PRINTS("nS_IDLE");
idxBuf = 0;
state = S_WAIT_CONN;
break;
case S_WAIT_CONN: // waiting for connection
{
client = server.available();
if (!client) break;
if (!client.connected()) break;
#if DEBUG
char szTxt[20];
sprintf(szTxt, "%03d:%03d:%03d:%03d", client.remoteIP()[0], client.remoteIP()[1], client.remoteIP()[2], client.remoteIP()[3]);
PRINT("nNew client @ ", szTxt);
#endif
timeStart = millis();
state = S_READ;
}
break;
case S_READ: // get the first line of data
PRINTS("nS_READ ");
while (client.available())
{
char c = client.read();
if ((c == 'r') || (c == 'n'))
{
szBuf[idxBuf] = '�';
client.flush();
PRINT("nRecv: ", szBuf);
state = S_EXTRACT;
}
else
szBuf[idxBuf++] = (char)c;
}
if (millis() - timeStart > 1000)
{
PRINTS("nWait timeout");
state = S_DISCONN;
}
break;
case S_EXTRACT: // extract data
PRINTS("nS_EXTRACT");
// Extract the string from the message if there is one
getData(szBuf, BUF_SIZE);
state = S_RESPONSE;
break;
case S_RESPONSE: // send the response to the client
PRINTS("nS_RESPONSE");
// Return the response to the client (web page)
client.print(WebResponse);
client.print(WebPage);
state = S_DISCONN;
break;
case S_DISCONN: // disconnect client
PRINTS("nS_DISCONN");
client.flush();
client.stop();
state = S_IDLE;
break;
default: state = S_IDLE;
}
}
void setup()
{
Serial.begin(57600);
PRINTS("n[MD_Parola WiFi Message Display]nType a message for the scrolling display from your internet browser");
P.begin();
P.setIntensity(0);
P.displayClear();
P.displaySuspend(false);
P.displayScroll(curMessage, PA_LEFT, scrollEffect, frameDelay);
curMessage[0] = newMessage[0] = '�';
// Connect to and initialise WiFi network
PRINT("nConnecting to ", ssid);
WiFi.begin(ssid, password);
while (WiFi.status() != WL_CONNECTED)
{
PRINT("n", err2Str(WiFi.status()));
delay(500);
}
PRINTS("nWiFi connected");
// Start the server
server.begin();
PRINTS("nServer started");
// Set up first message as the IP address
sprintf(curMessage, "%03d:%03d:%03d:%03d", WiFi.localIP()[0], WiFi.localIP()[1], WiFi.localIP()[2], WiFi.localIP()[3]);
PRINT("nAssigned IP ", curMessage);
}
void loop()
{
handleWiFi();
if (P.displayAnimate())
{
if (newMessageAvailable)
{
strcpy(curMessage, newMessage);
newMessageAvailable = false;
}
P.displayReset();
}
}


Good
This is very nice project please 🙏can you guys include the time and date on the display by updating the code?
Hi, thank you for this wonderful project. I however will urgently need your help on the wireless display noticeboard using ESP8266 module. I did all the connections and uploaded the code to my ESP8266 module which really display IP address, however, when i type this IP address on my web browser, it does not link me to the app for sending the text to project dot matrix display. Please i need your help. Thanks