After building the Motion Sensing Photo Capturing Device using ESP32-CAM on the recent project, now we are going to make an IoT based Smart Motion Sensing Camera using ESP32-CAM. With the help of this project, we can control ESP32-CAM from anywhere in the world using the Telegram application. You can capture photos, monitor real-time temperature, and also turn on and off lights. If the PIR sensor detects any motions, the camera will take a photo and send it to your Telegram app.
The best part of this project is that you don’t have to be connected to the same WiFi network, you can receive the photos if the ESP32-CAM is connected to any WiFi network. After reading this article, you will be able to make this project easily as I have already mentioned the circuit, source code, and other necessary steps below.
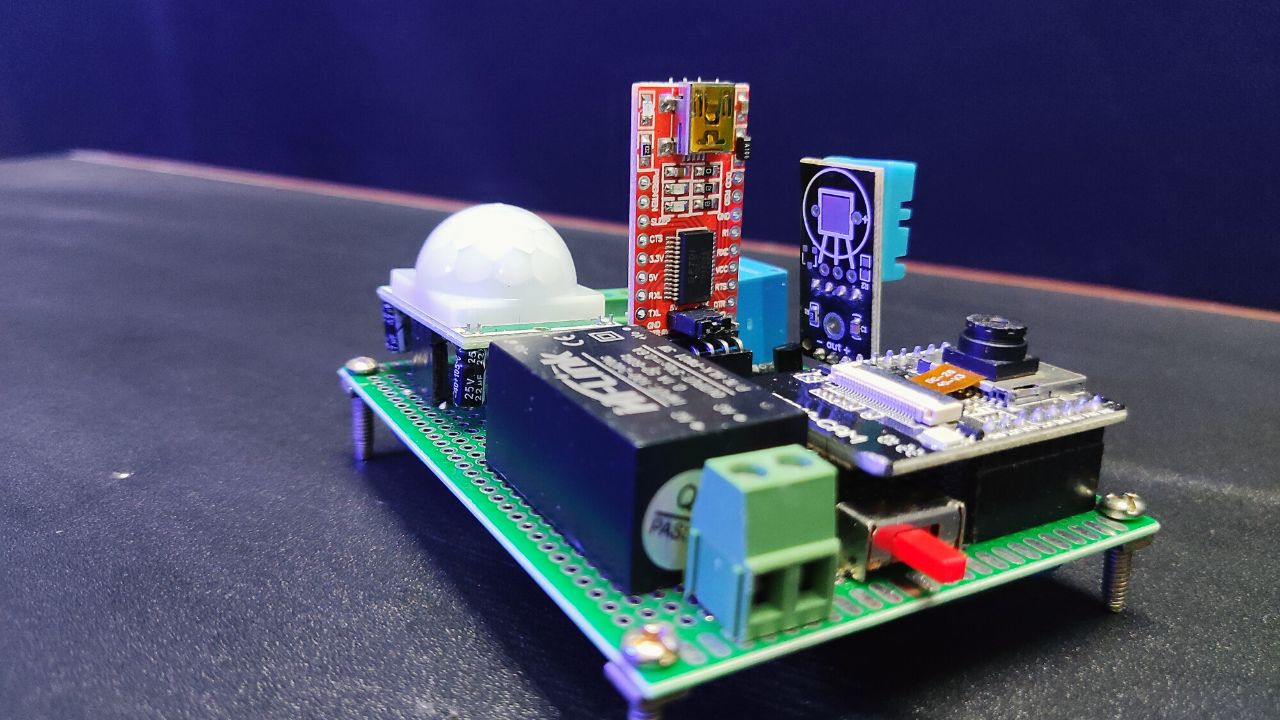
Project

Circuit Diagram

Components Required
- ESP32-CAM Camera Module
- FTDI232 TTL Converter
- PIR Motion Sensor
- DHT11 Temperature & Humidity Sensor
- 220Ω Resistor (x2)
- 1KΩ Resistor (x2)
- 1N4007 PN Diode
- BC547 NPN Transistor (x2)
- LED (Green, Red)
- 5V SPDT Relay
- 2-Pin Terminal (x2)
- SPDT Slide Switch
- 5V Hi-Link AC to DC Converter
- Double-Sided PCB Board
Features of Smart Motion Sensing Camera
Before going through the details let’s discuss some features of this project. Here in the circuit, we have given the AC supply to the DC circuit using a 5-volt Hi-Link AC to DC converter. After opening the bot on your Telegram app, you have to tap on the start button, then you will see the menu like below.
/photo
When we press the “/photo” option, the ESP32-CAM board receives the message through Telegram, captures a photo, and sends it to the Telegram bot as well.
/photowithFlash
We can use the flash feature by pressing the “/photoWithFlash” to turn on ESP32-CAM’s LED flash while capturing the photo.
/lightOn & /lightOff
Also, we can turn on the light of the ESP32-CAM module by using the “/lightOn & /lightOff” features.
/motionOn & /motionOff
We can activate/deactivate the PIR motion sensor by sending the message “/motionOn or /motionOff”, if the motion sensor is in an active state, it will continue to send photos to the Telegram bot.
/weather
Also, you can monitor the temperature through the DHT11 sensor and control the PIR motion sensor through the internet by sending the signal “/weather”.
/lightOn &/lightOff
You can switch on and off an AC appliance by sending the signal “/lightOn or /lightOff”.
Setup Telegram Bot for Smart Motion Sensing Camera
Before programming, you have to create a bot on Telegram. For that first, you have to download the Telegram application from Google Playstore and log in through your ID.
- Now search for “botfather” on Telegram and tap on restart. Now to create a new bot, you have to tap or type “/newbot” and give a unique name for the bot.
- After that, it will ask for a username for that bot, so you have to provide a username containing “_bot” at the end.
- After that, you will see that it gives you an HTTP API bot token which is required for adding to the coding section.
- Now just exit from botfather and search for “myidbot”. Tap on “Start or Restart” and then tap on “/getid” to get the id required for coding.


Now you can move to the coding part of the project.
Installing ESP32 Board Manager on Arduino IDE
First, click Preferences > Aditional boards Manager URLs
Paste “https://raw.githubusercontent.com/espressif/arduino-esp32/gh-pages/package_esp32_dev_index.json” on the blank space and press OK and save it.
Then install the ESP32 board (2.0.5) from the board manager section.
Programming ESP32-CAM Module Using FTDI Converter
Connect the ESP32-CAM and turn it on into the programming mode through the sliding switch. Then you have to connect the FTDI TTL converter to program the ESP32-CAM module and connect to the laptop to upload the code to the ESP32-CAM WiFi board.

ESP32-CAM Code for Smart Motion Sensing Camera
After programming, remove the FTDI converter and turn the switch off from program mode.
Download the required libraries before uploading the code to the ESP32-CAM.
- UniversalTelegramBot Library
- ArduinoJson Library
- DHT Library

Now connect the PIR motion sensor and the DHT11 motion sensor to it. Connect the AC supply and the AC appliance.
Now go to the “botfather” window, and you will get a link for your bot. Tap on it and then tap on start, and you will get the menu for controlling your devices.
Note: If you want to interact with the bot from another Telegram ID, you will get a “Unauthorized User” message.


its a good project
IoT அடிப்படையிலான ஸ்மார்ட் மோஷன் சென்சிங் கேமரா