Premium IoT Smart Energy Meter Source Code (PZEM-004T, Blynk)

5.00 out of 5
(1 customer review)

199.00

Build a commercial-grade IoT Smart Energy Meter with this complete, ready-to-compile source code. Designed for the ESP32 and PZEM-004T sensor, this code provides real-time monitoring of Voltage, Current, Power, Energy, Frequency, and Power Factor. Features include a live interactive LCD, Blynk IoT cloud dashboard integration, secure blynk daily reporting, and advanced EEPROM flash wear protection. Perfect for electronics developers, students, and commercial prototyping.

SKU: DIG-EMS-CODE-V7 Category:

Description

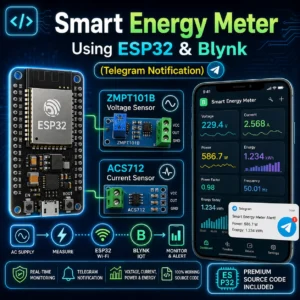
Whether you are a DIY electronics enthusiast, an engineering student, or a smart home builder, this complete, ready-to-flash ESP32 source code provides everything you need to build a professional-grade energy monitor. Powered by the ESP32 microcontroller and the highly accurate PZEM-004T sensor, this system tracks your electricity usage in real-time and calculates your running costs automatically.

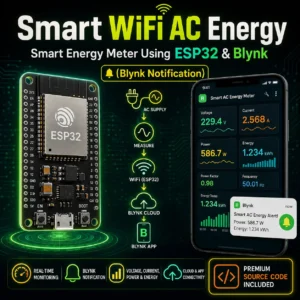
View your live data directly on the physical I2C LCD screen, or monitor your home’s energy consumption from anywhere in the world using the Blynk IoT app. We’ve handled the complex coding—including EEPROM memory saving, auto-scrolling display logic, and cloud syncing—so you can focus on building your project.

⚠️ Important Notice

Digital Source Code Only • No Physical Product • No Refund

It is a digital product, so no refund will be given after purchase. If you face any issue contact me within 3 days of purchase. Nothing will be entertained after this time period.

📩 Contact Now

🌟 Key Features Included in the Code:

  • Real-Time Data Extraction: Accurately reads Voltage (V), Current (A), Power (W), Energy (kWh), Frequency (Hz), and Power Factor (PF) using the PZEM-004T sensor.
  • Automatic Cost Calculation: Automatically converts your kWh usage into your local currency (default set to PHP, easily adjustable in the code).
  • Non-Volatile Memory (EEPROM Protection): Never lose your data during a power outage. The code automatically saves energy and cost data to the ESP32’s flash memory every 30 seconds.
  • Smart LCD Interface: Features a 4-page rotating display on a 16×2 I2C LCD. Pages automatically scroll every 3 seconds, or users can manually cycle through pages using a physical push button.
  • Global Cloud Monitoring: Fully integrated with the new Blynk IoT platform. Syncs all 7 data points to the cloud every second for real-time mobile dashboard viewing.
  • Dual-Reset Functionality: Safely reset your energy accumulation and cost back to zero either locally (by holding the physical button for 3 seconds) or remotely via a virtual button in the Blynk app.
  • Automated Push Notifications: Configured to send a periodic energy and cost report directly to your smartphone via Blynk Events.
  • Failsafe Filtering: Includes logic to filter out phantom sensor noise when voltage drops below 30V.

🛠️ Hardware Requirements

To use this code, you will need the following components:

  • ESP32 Development Board
  • PZEM-004T (v3.0) UART Communication Module
  • 16×2 I2C Liquid Crystal Display (LCD)
  • 1kΩ Resistor (Crucial for logic level shifting between PZEM and ESP32)
  • Standard Push Button
  • Veroboard or Breadboard
  • Male to Male and Male to Female Jumper Wires
  • 5V Power Supply
  • AC 1.0 sqmm Wire
  • AC Socket for Output Load

📦 What You Get with Your Purchase?

  • Instant digital download of the .ino Arduino source code file.
  • Clean, heavily commented code that is easy to customize.
  • A list of all required libraries (PZEM004Tv30, ArduinoJson v7, BlynkSimpleEsp32, etc.) for a frictionless compilation.

📖 Setup & Installation Guide

Welcome! This guide will walk you through configuring the source code and uploading it to your ESP32 board.

Prerequisites

  1. Download and install the latest Arduino IDE.
  2. Ensure you have a high-quality micro-USB or USB-C cable (must support data transfer, not just charging).

Step 1: Add ESP32 Support to Arduino IDE

By default, the Arduino IDE doesn’t know how to talk to an ESP32. Let’s add it.

  1. Open the Arduino IDE. Go to File > Preferences.
  2. In the Additional Boards Manager URLs field, paste this exact link: [https://raw.githubusercontent.com/espressif/arduino-esp32/gh-pages/package_esp32_index.json]
  3. Click OK.
  4. Go to Tools > Board > Boards Manager.
  5. Search for “esp32” and click Install on the package by Espressif Systems.

Step 2: Install Required Libraries

Your code relies on specific libraries to function. Go to Sketch > Include Library > Manage Libraries and search for/install the following:

  • Blynk by Volodymyr Shymanskyy
  • LiquidCrystal I2C by Frank de Brabander
  • PZEM004Tv30 by Jakub Mandula
  • ArduinoJson by Benoit Blanchon (Important: Make sure it installs Version 7.x)

Step 3: Configure Your Code (User Settings)

Open the .ino file in the Arduino IDE. Scroll down to the // ======================= USER CONFIGURATION ======================= section. You need to update these details:

1. Blynk Credentials

  • Log into Blynk Console and create a new Template.
  • Copy the Template ID, Template Name, and Auth Token provided by Blynk.
  • Paste them into the code inside the quotation marks:
// 1. Blynk IoT Credentials
#define BLYNK_TEMPLATE_ID "YOUR_TEMPLATE_ID"
#define BLYNK_TEMPLATE_NAME "YOUR_TEMPLATE_NAME"
char auth[] = "YOUR_BLYNK_AUTH_TOKEN";

2. WiFi Settings

  • Enter your local 2.4GHz WiFi network name and password:
// 2. WiFi Credentials
char ssid[] = "YOUR_WIFI_SSID";
char pass[] = "YOUR_WIFI_PASSWORD";

3. Blynk Push Notification Setup Guide

  • Open your Templates.
  • Select your project template and click Edit (top right).
  • Navigate to the Events tab and click + Add New Event.
Premium IoT Smart Energy Meter Source Code
  • Set Event Name: daily_tracker.
  • Set Event Code: daily_tracker (⚠️ CRITICAL: Must match exactly).
  • Set Type: Info.
Premium IoT Smart Energy Meter Source Code
  • Under the Notifications section, check Enable Notifications.
  • Check Email-To and set delivery to Device Owner.
  • Check Push Notification To and set delivery to Device Owner.
  • Scroll down and check both Enable notifications management and Deliver push notifications as alerts.
Premium IoT Smart Energy Meter Source Code
  • Set limit to 1 minute.
  • Then click on Save.
void sendPeriodicReport() {
  String msg = "Periodic Report\nEnergy: " + String(kWh, 3) + " kWh\nCost: " + String(cost, 2);
  Blynk.logEvent("daily_tracker", msg);
}

4. Electricity Pricing

  • Update the COST_PER_KWH to match your local electricity tariff (e.g., in Rupees):
// 2. Billing Settings
const float ratePerkWh = 8; // Update this to your local currency rate per kWh

Step 4: Upload the Code to Your ESP32

  1. Plug your ESP32 into your computer.
  2. Go to Tools > Board > esp32 and select your specific board (usually ESP32 Dev Module).
  3. Go to Tools > Port and select the COM port your ESP32 is connected to (e.g., COM3 on Windows, or /dev/cu.usbserial on Mac).
  4. Click the Upload button (the right-pointing arrow at the top left of the IDE).

⚠️ Troubleshooting the Upload

If the console at the bottom says Connecting... and then times out with a Fatal Error, do this:

  • Click Upload again.
  • When you see Connecting... appear at the bottom, press and hold the “BOOT” button physically located on the ESP32 board.
  • Once you see writing percentages (e.g., Writing at 0x00010000... (10 %)), release the BOOT button.

Step 5: Final Check

Once the upload says “Done Uploading”, open the Serial Monitor (magnifying glass icon in the top right). Set the baud rate to 115200.

You should see the ESP32 connect to WiFi, connect to Blynk, and begin displaying live voltage and current readings from your PZEM-004T!

Note: This is a digital product containing software source code only. No physical hardware is included.

1 review for Premium IoT Smart Energy Meter Source Code (PZEM-004T, Blynk)

  1. 5 out of 5

    amnnhk

    its work perfectly, thanks for personal guide.

Add a review

0