Hi everyone, we are back again with another interesting Arduino project. At this time, we aren’t dealing with well-known sensors, motors, and relay-like stuff. We are going to build a Stereo MP3 Player system using Arduino. Using a DFPlayer module which is very cheap, we can easily make this project. We already built a DFPlayer-based Thunder Lightning project previously. Make sure to check out.
MP3 players are getting old daily, as many types of alternatives are available in the market like mobile phones. But doing this project using Arduino is cool. Isn’t it?
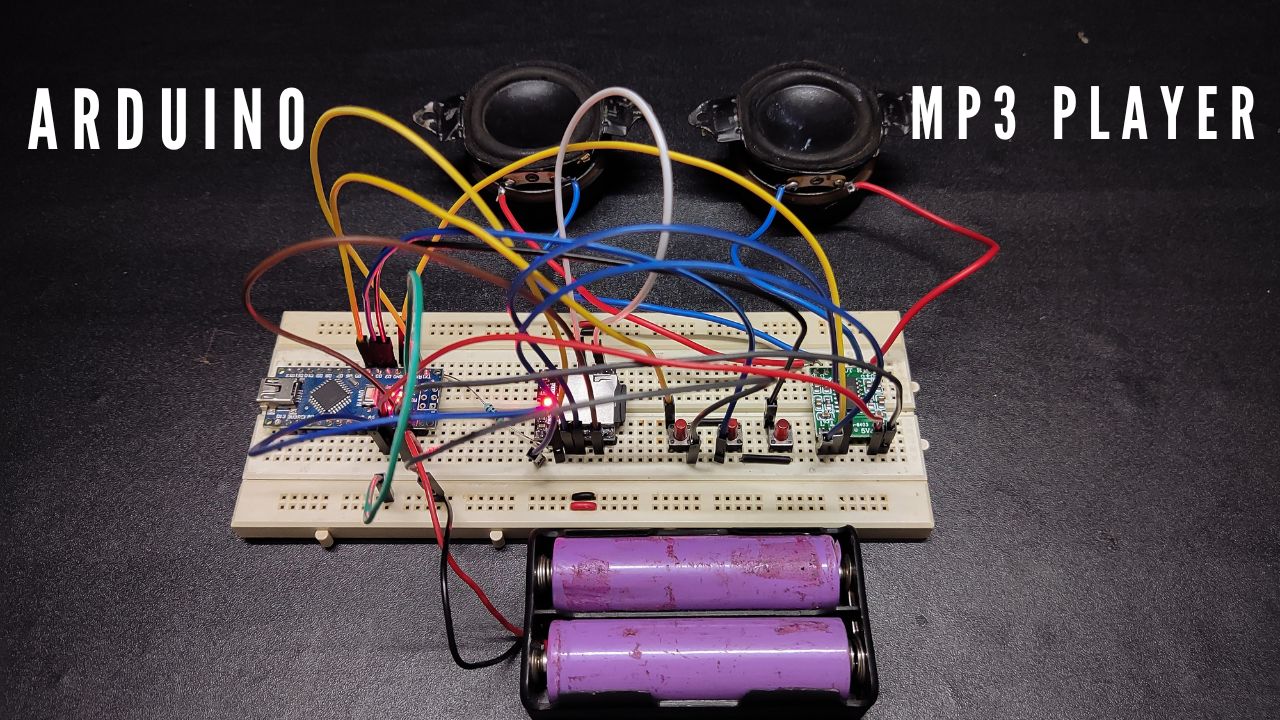
This stereo MP3 player uses a DFPlayer module with all the functions and inputs/outputs a decent MP3 player should have. It allows play/pause, next, and previous features with advanced equaliser, looping and shuffling functions. Later we can also add some extra features like Bluetooth, LCD display, etc. We will build this into two steps.
In the first step, we will build the main circuit which includes DFPlayer and Arduino. And in the second step, we add a PAM8403 amplifier to boost the sound for a better experience with stereo sound. So let’s build it.
Project

Circuit Diagram

Components Required
- Arduino Nano
- DFPlayer Mini Module
- SD Card
- 1KΩ Resistance
- Push Buttons (x3)
- Speakers (x2)
- Connection Wire
- Lithium-Ion Battery (x2)
- Lithium-Ion Battery Holder
- Veroboard
DFPlayer Mini Module

The DFPlayer Mini is a small, cheap MP3 module with a clear audio output that can be modified as mono or stereo output as per requirement. This is a standalone module that can be used with a microcontroller, attached battery, speakers, and push buttons. There are two enabled pins (RX/TX) for serial communication. Through these simple serial pins, we can command the module to play/pause songs, next and previous songs, shuffle, etc. The module comes with an SDcard slot and supports both FAT16 and FAT32 file systems.
DFPlayer Mini Pinout

Circuit Connection of Stereo MP3 Player
- Connect 5V output from Arduino Nano to the input VCC pin of the DFPlayer module.
- Connect the Arduino Nano ground pin to the DFPlayer module ground.
- For the transmission process, the Arduino D10 pin is to the DFPlayer module TX pin.
- And connect the Arduino D11 pin to the 1KΩ resistor, the other side of the resistor is connected to the DFPlayer module RX pin.
- For a stereo speaker, connect the left side wire of the PAM8403 amplifier module to the DFPlayer module DACL pin and the right side wire to the DACR pin respectively. Also, connect the ground wire to the DFPlayer ground pin.
While uploading code to the Arduino, disconnect RX pin and after uploading just connect it again.
Arduino Code
You need to install the “DFRobotDFPlayerMini.h” library before compiling the Arduino code.
#include "SoftwareSerial.h"
#include "DFRobotDFPlayerMini.h"
SoftwareSerial mySoftwareSerial(10, 11); // Define as RX & TX pin
DFRobotDFPlayerMini myDFPlayer;
int buttonNext = 2;
int buttonPause = 3;
int buttonPrevious = 4;
boolean isPlaying = false;
void setup()
{
  pinMode(buttonPause, INPUT);
  digitalWrite(buttonPause, HIGH);
  pinMode(buttonNext, INPUT);
  digitalWrite(buttonNext, HIGH);
  pinMode(buttonPrevious, INPUT);
  digitalWrite(buttonPrevious, HIGH);
  mySoftwareSerial.begin(9600);
  Serial.begin(9600);
  delay(1000);
  Serial.println();
  Serial.println("DFPlayer Mini");
  Serial.println("Initializing DFPlayer...");
  if (!myDFPlayer.begin(mySoftwareSerial))
  {
    Serial.println("Unable to Begin");
    Serial.println("1.Please Recheck The Connection");
    Serial.println("2.Please Insert the SD Card");
    while (true);
  }
  Serial.println(F("DFPlayer Mini Playing"));
  myDFPlayer.setTimeOut(500);
  myDFPlayer.volume(10); //Set Volume Value (0-30)
  //myDFPlayer.volumeUp(); //Volume Up
  //myDFPlayer.volumeDown(); //Volume Down
  myDFPlayer.EQ(DFPLAYER_EQ_NORMAL);
  //  myDFPlayer.EQ(DFPLAYER_EQ_POP);
  //  myDFPlayer.EQ(DFPLAYER_EQ_ROCK);
  //  myDFPlayer.EQ(DFPLAYER_EQ_JAZZ);
  //  myDFPlayer.EQ(DFPLAYER_EQ_CLASSIC);
  //  myDFPlayer.EQ(DFPLAYER_EQ_BASS);
  myDFPlayer.outputDevice(DFPLAYER_DEVICE_SD);
  myDFPlayer.play(1);
  isPlaying = true;
  Serial.println("Playing..");
}
void loop() {
  if (digitalRead(buttonPause) == LOW)
  {
    if (isPlaying)
    {
      myDFPlayer.pause();
      isPlaying = false;
      Serial.println("Paused");
    } else {
      isPlaying = true;
      myDFPlayer.start();
      Serial.println("Playing");
    }
    delay(500);
  }
  if (digitalRead(buttonNext) == LOW)
  {
    if (isPlaying) {
      myDFPlayer.next();
      Serial.println("Next");
    }
    delay(500);
  }
  if (digitalRead(buttonPrevious) == LOW)
  {
    if (isPlaying)
    {
      myDFPlayer.previous();
      Serial.println("Previous");
    }
    delay(500);
  }
}


Will build it soon.
This needs a volume up and down button code to make it perfect.