Programming is amazing to work and Arduino is an amazing platform if you are a beginner at embedded programming. We have previously built a Boolean Algebraic Calculator using Arduino. In this article, we will learn to make our own mathematical calculator using Arduino. The values can be put in using a keypad (4×4 keypad) and the result will be shown on an LCD screen (16×2 dot-matrix display). This calculator could be used to do simple operations like addition, subtraction, multiplication and division with whole numbers. But once you have understood the concept, you can implement scientific functions parallelly with Arduino’s built-in functions.
When this project ends, you will learn to use a 16×2 LCD and keypad with Arduino and also know how easy it is to program using the already available Arduino IDE libraries. You will also get to know, how to program your Arduino to accomplish a specific task.
Project

Circuit Diagram

Components Required
- Arduino Nano
- 16×2 LCD Display
- I2C LCD Module
- 4×4 Keypad
- Connection Wires
- Breadboard
- 5 Volt Power Supply
Circuit Connection for Arduino Calculator
The complete circuit connection for this Arduino Calculator Project is shown above. The +5V and ground connection shown in the circuit diagram will be obtained from the 5V and ground pin of the Arduino. The Arduino will get its power from your laptop or through the DC jack which uses a 12V adapter or from a 9V battery.
We are running the LCD in a 4-bit system with Arduino so, only the last four data bits of the LCD are connected to Arduino. The keyboard has 8 output pins which we have to connect from pin 0 to pin 7 as mentioned in the diagram. You can also use the following connection table to recheck the connection with Arduino.
Some Arduino boards may show an error while uploading the program if there’s anything connected to pin 0 and pin 1, if you face any error just keep the keypad removed while uploading the program.
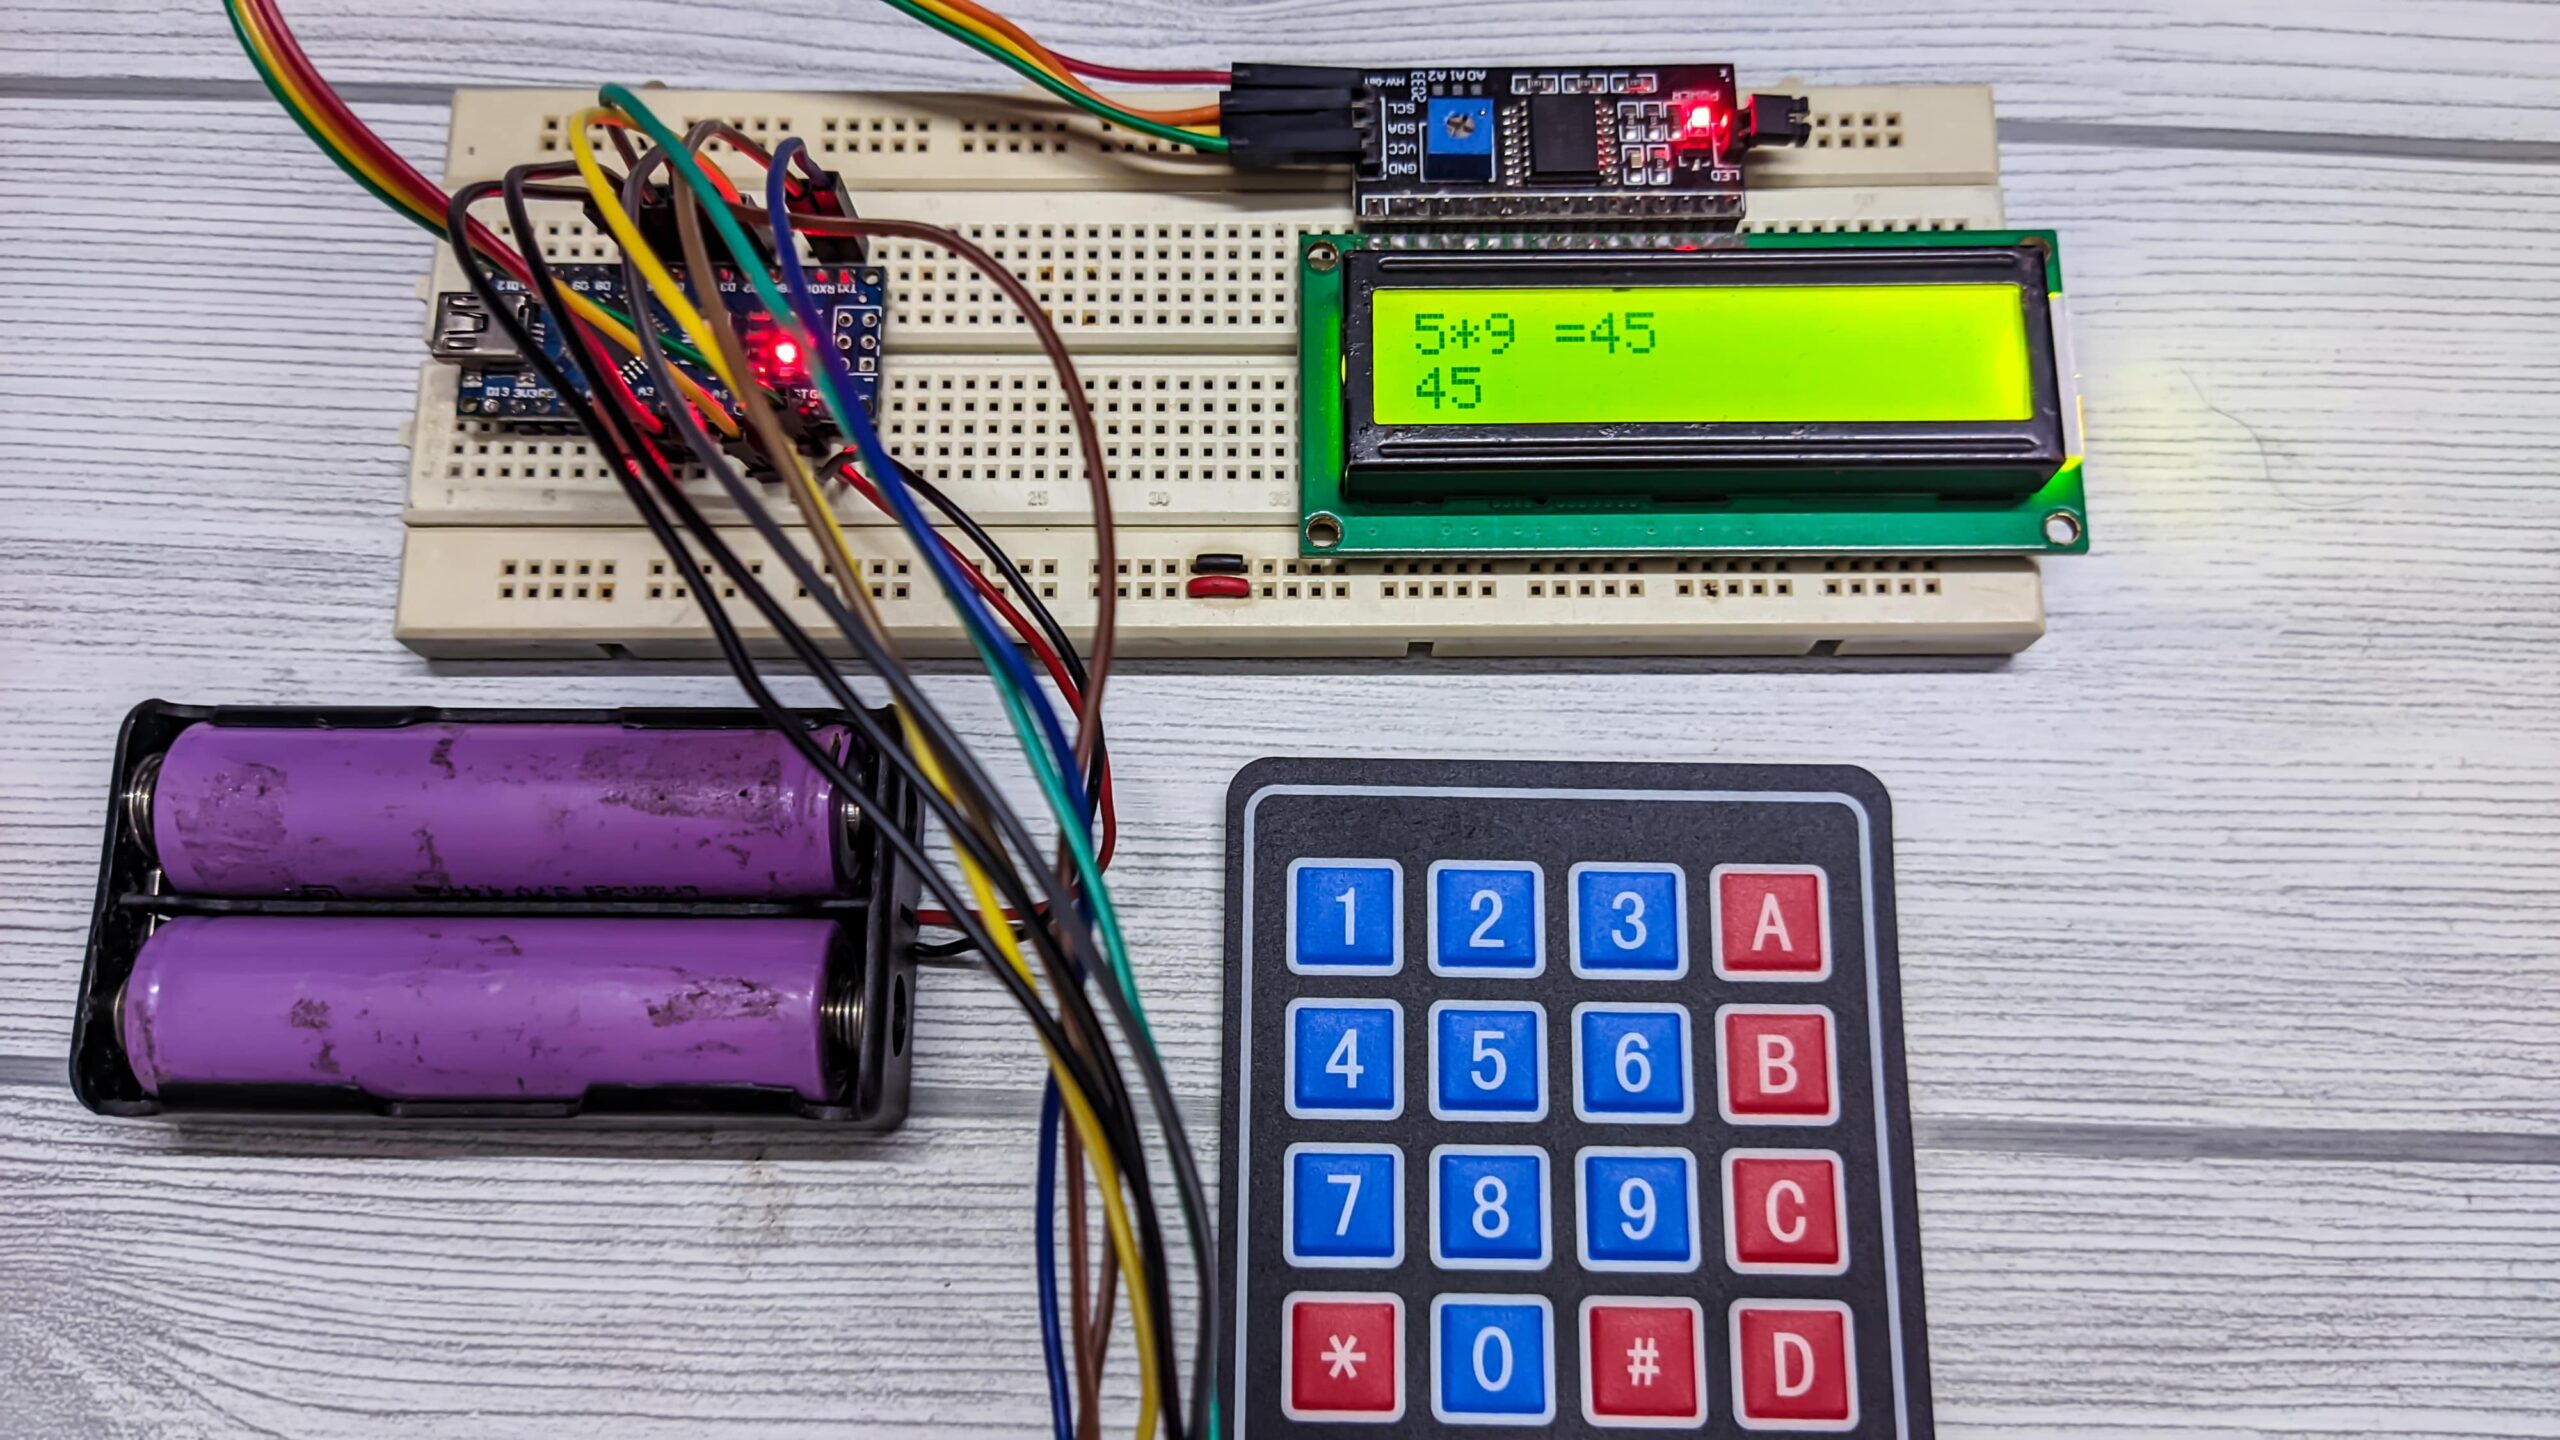
After your connections are done your hardware will be looking like this as mentioned shown below.
Working Principle of Arduino Calculator
Link the connections according to the circuit diagram and upload the code mentioned below. If it’s showing an error cross check that you have added the library according to the instructions given above. You can also run the simulation to check if your hardware has any problems. If everything is okay as it’s supposed to be, then your project will be looking like this below with the LCD displaying this, as the keypad that we used here doesn’t have any specific markings on it, I have assumed the alphabet to be operated.
You should mark what each button actually represents, it will be much easier to interpret, after that’s done, you can directly start using the calculator. Type the number and it will appear on the second line, press the operand and type your second number finally press the “#” key to get the result.
Arduino Calculator Program
The complete Arduino program of this project is added at the end of this project. The code is divided into tiny meaningful pieces and is explained below.
As mentioned above, we gonna interface an LCD and keypad with Arduino using libraries. So first thing to do is add them to our Arduino IDE. The library for LCD is already included in your Arduino by default so we don’t need to worry about it. For the Keypad library tap the link to download it from GitHub. You will get a ZIP file, add lib to Arduino by Sketch -> Include Library -> Add. ZIP file and direct the location to this downloaded file. After that is done, we are all set and ready to program.
Even if we have used a library to use a keypad we have to mention a few important details (shown below) about the keypad to the Arduino. The variable “Rows” and “Cols” will let you know how many rows and columns our keypad has and the keymap shows the order in which the keys are set on the keyboard. The keypad, I am using in this project looks like this below the keymap also looks the same.
Further below we have mentioned to which pins the keypad is connected using the variable array “rowPins” and “colPins“.
Arduino Code
#include <Wire.h>
#include <LiquidCrystal_I2C.h>
#include <Keypad.h>
LiquidCrystal_I2C lcd(0x27, 16, 2);
const byte ROWS = 4; // Four rows
const byte COLS = 4; // Four columns
// Define the Keymap
char keys[ROWS][COLS] =
{
  {'1','2','3','A'},
  {'4','5','6','B'},
  {'7','8','9','C'},
  {'*','0','#','D'}
};
byte rowPins[ROWS] = { 0, 1, 2, 3 };// Connect keypad ROW pins to Arduino pins.
byte colPins[COLS] = { 4, 5, 6, 7 }; // Connect keypad COL pins to Arduino pins.
Keypad kpd = Keypad( makeKeymap(keys), rowPins, colPins, ROWS, COLS );
 long Num1,Num2,Number;
 char key,action;
 boolean result = false;

void setup()
{
  lcd.init();

  lcd.backlight();

  lcd.print("Arduino Calculator");
  lcd.setCursor(0, 1);   // set the cursor to column 0, line 1
  lcd.print("Electro Gadget");
  delay(2000); // Wait for display to show info
  lcd.clear();
}
void loop()
{
key = kpd.getKey(); //storing pressed key value in a char format
if (key!=NO_KEY)
DetectButtons();
if (result==true)
CalculateResult();
DisplayResult();
}
void DetectButtons()
{
    lcd.clear();
    if (key=='*') //If cancel Button is pressed
    {Serial.println ("Button Cancel"); Number=Num1=Num2=0; result=false;}
     if (key == '1') //If Button 1 is pressed
    {Serial.println ("Button 1");
    if (Number==0)
    Number=1;
    else
    Number = (Number*10) + 1; //Pressed twice
    }
     if (key == '4') //If Button 4 is pressed
    {Serial.println ("Button 4");
    if (Number==0)
    Number=4;
    else
    Number = (Number*10) + 4; //Pressed twice
    }

     if (key == '7') //If Button 7 is pressed
    {Serial.println ("Button 7");
    if (Number==0)
    Number=7;
    else
    Number = (Number*10) + 7; //Pressed twice
    }

    if (key == '0')
    {Serial.println ("Button 0"); //Button 0 is Pressed
    if (Number==0)
    Number=0;
    else
    Number = (Number*10) + 0; //Pressed twice
    }

     if (key == '2') //Button 2 is Pressed
    {Serial.println ("Button 2");
     if (Number==0)
    Number=2;
    else
    Number = (Number*10) + 2; //Pressed twice
    }
     if (key == '5')
    {Serial.println ("Button 5");
     if (Number==0)
    Number=5;
    else
    Number = (Number*10) + 5; //Pressed twice
    }

     if (key == '8')
    {Serial.println ("Button 8");
     if (Number==0)
    Number=8;
    else
    Number = (Number*10) + 8; //Pressed twice
    }

    if (key == '#')
    {Serial.println ("Button Equal");
    Num2=Number;
    result = true;
    }

     if (key == '3')
    {Serial.println ("Button 3");
     if (Number==0)
    Number=3;
    else
    Number = (Number*10) + 3; //Pressed twice
    }

     if (key == '6')
    {Serial.println ("Button 6");
    if (Number==0)
    Number=6;
    else
    Number = (Number*10) + 6; //Pressed twice
    }

     if (key == '9')
    {Serial.println ("Button 9");
    if (Number==0)
    Number=9;
    else
    Number = (Number*10) + 9; //Pressed twice
    }
      if (key == 'A' || key == 'B' || key == 'C' || key == 'D')
  {
    Num1 = Number;
    Number =0;
    if (key == 'A')
    {Serial.println ("Addition"); action = '+';}
     if (key == 'B')
    {Serial.println ("Subtraction"); action = '-'; }
     if (key == 'C')
    {Serial.println ("Multiplication"); action = '*';}
     if (key == 'D')
    {Serial.println ("Devesion"); action = '/';}
    delay(100);
  }
}
void CalculateResult()
{
  if (action=='+')
    Number = Num1+Num2;
  if (action=='-')
    Number = Num1-Num2;
  if (action=='*')
    Number = Num1*Num2;
  if (action=='/')
    Number = Num1/Num2;
}
void DisplayResult()
{
  lcd.setCursor(0, 0);
  lcd.print(Num1); lcd.print(action); lcd.print(Num2);
  if (result==true)
  {lcd.print(" ="); lcd.print(Number);} //Display the result
  lcd.setCursor(0, 1);
  lcd.print(Number); //Display the result
}


Will be updated soon.
Hi
What about decimal point and backspace key???