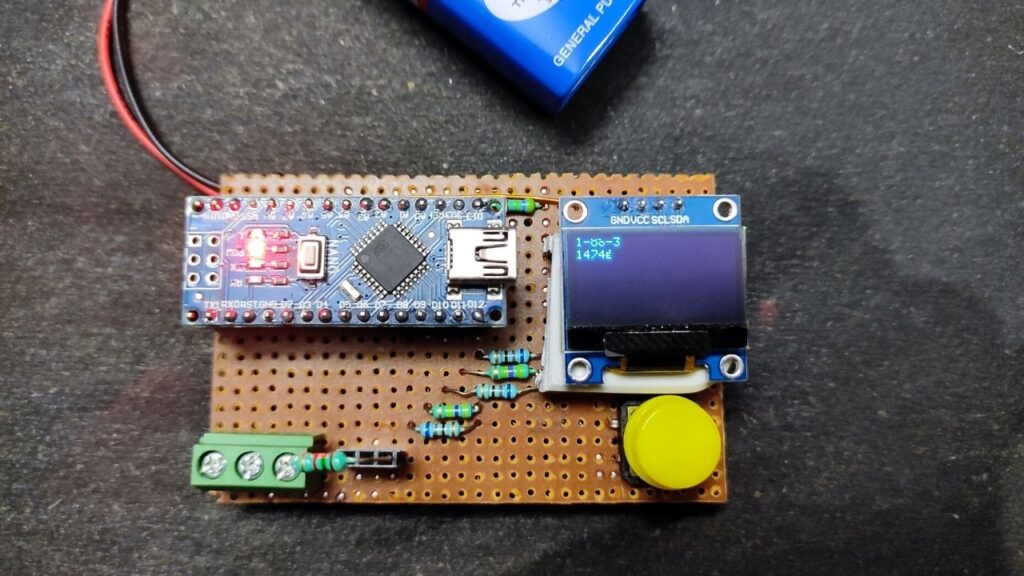
In this Arduino project, I am going to show you how to make an interesting Arduino based basic Electronic Component Tester. We can test many components with this single tester like transistors, diodes, resistors, capacitors, thyristors, MOSFETs, inductors, LEDs and many more. In this article, I will discuss how I made this device at minimal cost and how it works.
For quite some time I asked myself how is it possible to build such a versatile component tester for under 10 dollars. After searching too many component testers in the online market it is found a little bit costly. Most people have at least seen those component testers on Chinese websites for around 10 dollars. So I decide to make such an electronic components tester using some basic components and to reduce the total costs.
Must Read Arduino Capacitance Meter
History of Electronic Component Tester
According to history, Markus Frejek had the idea and did the first implementation of such a tester. Then Karl-Heinz-Kubbeler and others enhanced the design as well as the software. There are many device implementations on the internet but all are based on the original design and software.
All models have a few things in common, they have three test pins including a display, a button to start and a battery. Also, some have a nice looking graphical display and some have a rotary encoder for driving an extended menu system.
Principle Behind Electronic Component Tester
For testing an electronic component, first, we need to insert it in a 3 pin socket. Then by pressing a push-button the testing device test the component and gives us some values. These include what is the part, which type of component, pin arrangement, and the value of the component. At last, the result will display on an OLED display via an I2C port.
Project

Circuit Diagram

Components Required
- Arduino Nano
- OLED Display
- 470KΩ Resistor (x3)
- 680Ω Resistor (x3)
- Push Button
- Connection Wires
- Vero Board
- 9V Battery
Circuit And Working Principle of Electronic Component Tester
How do we connect the legs to the test pins?
There is a simple answer even if one tester has six pins and more, we need not worry about that. Because all devices have only three test pins and the remaining pins are somehow connected to these three pins.
Also, we thought about which test pin is used for what, where is ground and where should we connect both 2 legs and 3 legs components in the same three pins socket? The answer is we do not need to know that we just need to insert the components. The tester will find the pinout itself automatically.
How does the tester do it?
For that, we have to dig a little into the circuit diagram of the electronic component tester as well as the Arduino chip used in it. Let’s first talk about the Arduino chip. We all know that we can switch a pin as input or as output using the “pinMode” command. It has three possibilities ‘OUTPUT’, ‘INPUT’ and ‘INPUT_PULLUP’.
How do the engineers of Atmel solve the problem of creating these universal pins?

Here is the simplified diagram of a pin of an ATmega chip. It has three resistors and three switches as well as a connection to the Analog to Digital converter. Also, it has two diodes that protect the chip if you accidentally connect the pin to a negative voltage or two more than VCC. Here is also the secret behind the 5V compatibility of the ESP8266 for example.
On the ESP8266, VCC is only 3.3V and if you connect 5V to a pin, the diode D1 starts to conduct. If you would connect your power supply to the pin a very high current would flow across the D1 diode and it would destroy the chip in a millisecond. But if you connect the output pin of a sensor to the pin, the current is limited by this resistor inside the sensor chip. The diode reduces the voltage too little above VCC and the ESP is not destroyed.
Now come to our main project electronic component tester. Here we can forget about two diodes and also the pullup resistor because they are not needed. Let’s assume we configure our pins as an output. Then the switch SW is closed and the pin is either connected via 22Ω resistor to VCC or via 19Ω resistor to ground. These values are only approximations and can differ in reality.
Now we can switch the level of the pin using the command ‘digitalWrite(LOW)’ or ‘digitalWrite(HIGH)’. This command moves this switch but what happens to the level of the pin if we select pinMode input. Then SW is opened and the pin has a high impedance. It is only connected to the ADC (Analog Digital Converter) and has nearly no current that can flow. Each pin can have three different states i.e. ground, VCC and open. This is why such pins are also called three-state pins.
Markus knew about that. But he had a huge problem to overcome. The only thing such a pin can measure is voltage from 0V to 5V. and because all MCUs use clocks, they also can measure time.
He connected two resistors to each of the three test pins and then he connected these resistors to pins of the Arduino. Besides that, he attached one Arduino pin directly to the test pin. But as with all great things it has to be simple. If we simplify the drawing and arrange it a little different, we can choose seven possibilities for each test pin.
- Ground or VCC by a 680Ω resistor.
- Open ground or VCC via 470KΩ resistor, ground and VCC.
In addition to these seven possibilities, we can measure voltage. Now let’s connect a resistor between test pins 1 and pin 2. If we connect pin 1 to VCC and pin 2 to ground a current flows through the resistor. But I said Arduino only can measure voltage, no current. So Markus selects the 680Ω resistor for pin 1 and creates a voltage divider. Now the Arduino can measure the voltage at test pin 1 and calculate the resistor we insert it between test pin 1 and pin 2.
Of course, we can see limitations. The accuracy of the measurement heavily depends on the accuracy of the VCC of the 680Ω resistor and the ADC in the Arduino. VCC is usually not very precise. Then the suppliers should use precise 680 and 470KΩ resistors. If we talk about accuracy, we have to mention the reason for the 470KΩ resistor. It is used if we insert a high resistor of for example 1MΩ. Then the voltage at test pin 1 would be very close to VCC. Then the software changes to the 470KΩ resistor and the voltage are much lower. This is the next trick Markas used to get the vast range of detectable parts which acceptable accuracy. Now we are done with understanding the principle.
Let’s look at the next problem Markas faced. Here you have the whole mess of many different parts to distinguish and test. If we start with the passives, he has to detect resistors capacitors and inductors. Then Three Types of diodes. I know diodes usually are not passive. But the space here on the slide was handy to put them here.
By the way, do you know how to separate a standard diode from a Schottky diode? The Schottky diode has a much lower forward voltage of only around 0.3V. The standard diode has approximately 0.7V. This is why we often used Schottky diodes in power supplies. Now you see how Markas worked. He had to find a fingerprint for each part category and not only that but you had also to make sure that not two-part types have the same fingerprints.
Let’s go to the active components. If we start with transistors we have Bipolar Junction Transistor or BJT and Field Effect Transistor also called FET. In the BJT, we have NPN and PNP transistors. Then we have two categories of effect both available in N and P channel versions. But that’s not all we also have IGBTs, Thyristors and Triacs.
I don’t know how he thought that he could create a distinctive fingerprint for each category in this mess. But obviously, he believed it. On top of that, we never should forget this device has no clue which leg is inserted in which pin an additional complication. One thing you should also remember some of these parts are very delicate and can be destroyed by overvoltage or overcurrent especially if you do not know which pin is which and insert them the wrong way. So he has to make sure that the device never starts with a lethal voltage if it’s not 100% sure.
How to measure resistance with this tester?


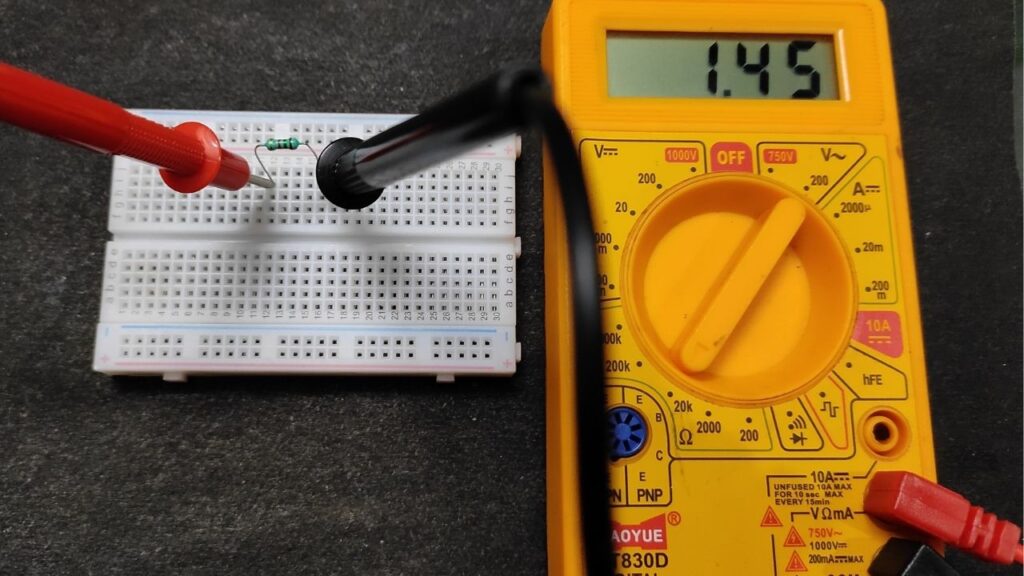
To see the tester work, let’s have a look at the voltages of the three pins. The tester tries various things and based on each measurement, it selects new tests until it is clear that a resistor is between pin 1 and pin 2. Then it measures its resistance and displays the result. The resistor by the way is a 1.5KΩ resistor and the multimeter measures 1.45KΩ and the component tester measures it as 1.47KΩ. If we connect the same resistor between test pin 1 and pin 3, the tester has to select a different test pattern. But in the end the reading is the same.
Now let’s try with a capacitor. Here we have to talk a little on how we can measure capacity with this poor Arduino which is blind on nearly all eyes. Only can measure voltages and time. If we connect a resistor in series to a capacitor, it is charged over time. As you know now the tester easily can create such a diagram by connecting VCC via 680 ohm resistor. If we wait a specific time, we can switch pin 1 OFF and measure the voltage. Now we can calculate the capacity because we know all parameters of the formula. Let’s see the result.

Arduino Code
Click here to download the code.
Hi sir
I have big issue 😔
When I try to compline Sketch I got error
Use of undeclared identifier “lcd_string”
Like this many error please tell me solution
Thank you 🙏
Did you select the right board and right port along with connecting the Arduino board with your PC? If yes then check that when you plugged your board into the PC, any other COM port appears or not. If not then you do have not Arduino serial port driver installed on the PC. So first install the driver.