In this project, we will be going to build a simple Electronic Voting Machine using an Arduino LCD display. The main motive of this project is to design an electronic voting machine that will help to pull up the fraudulent manual voting systems and prior versions of electronic voting.
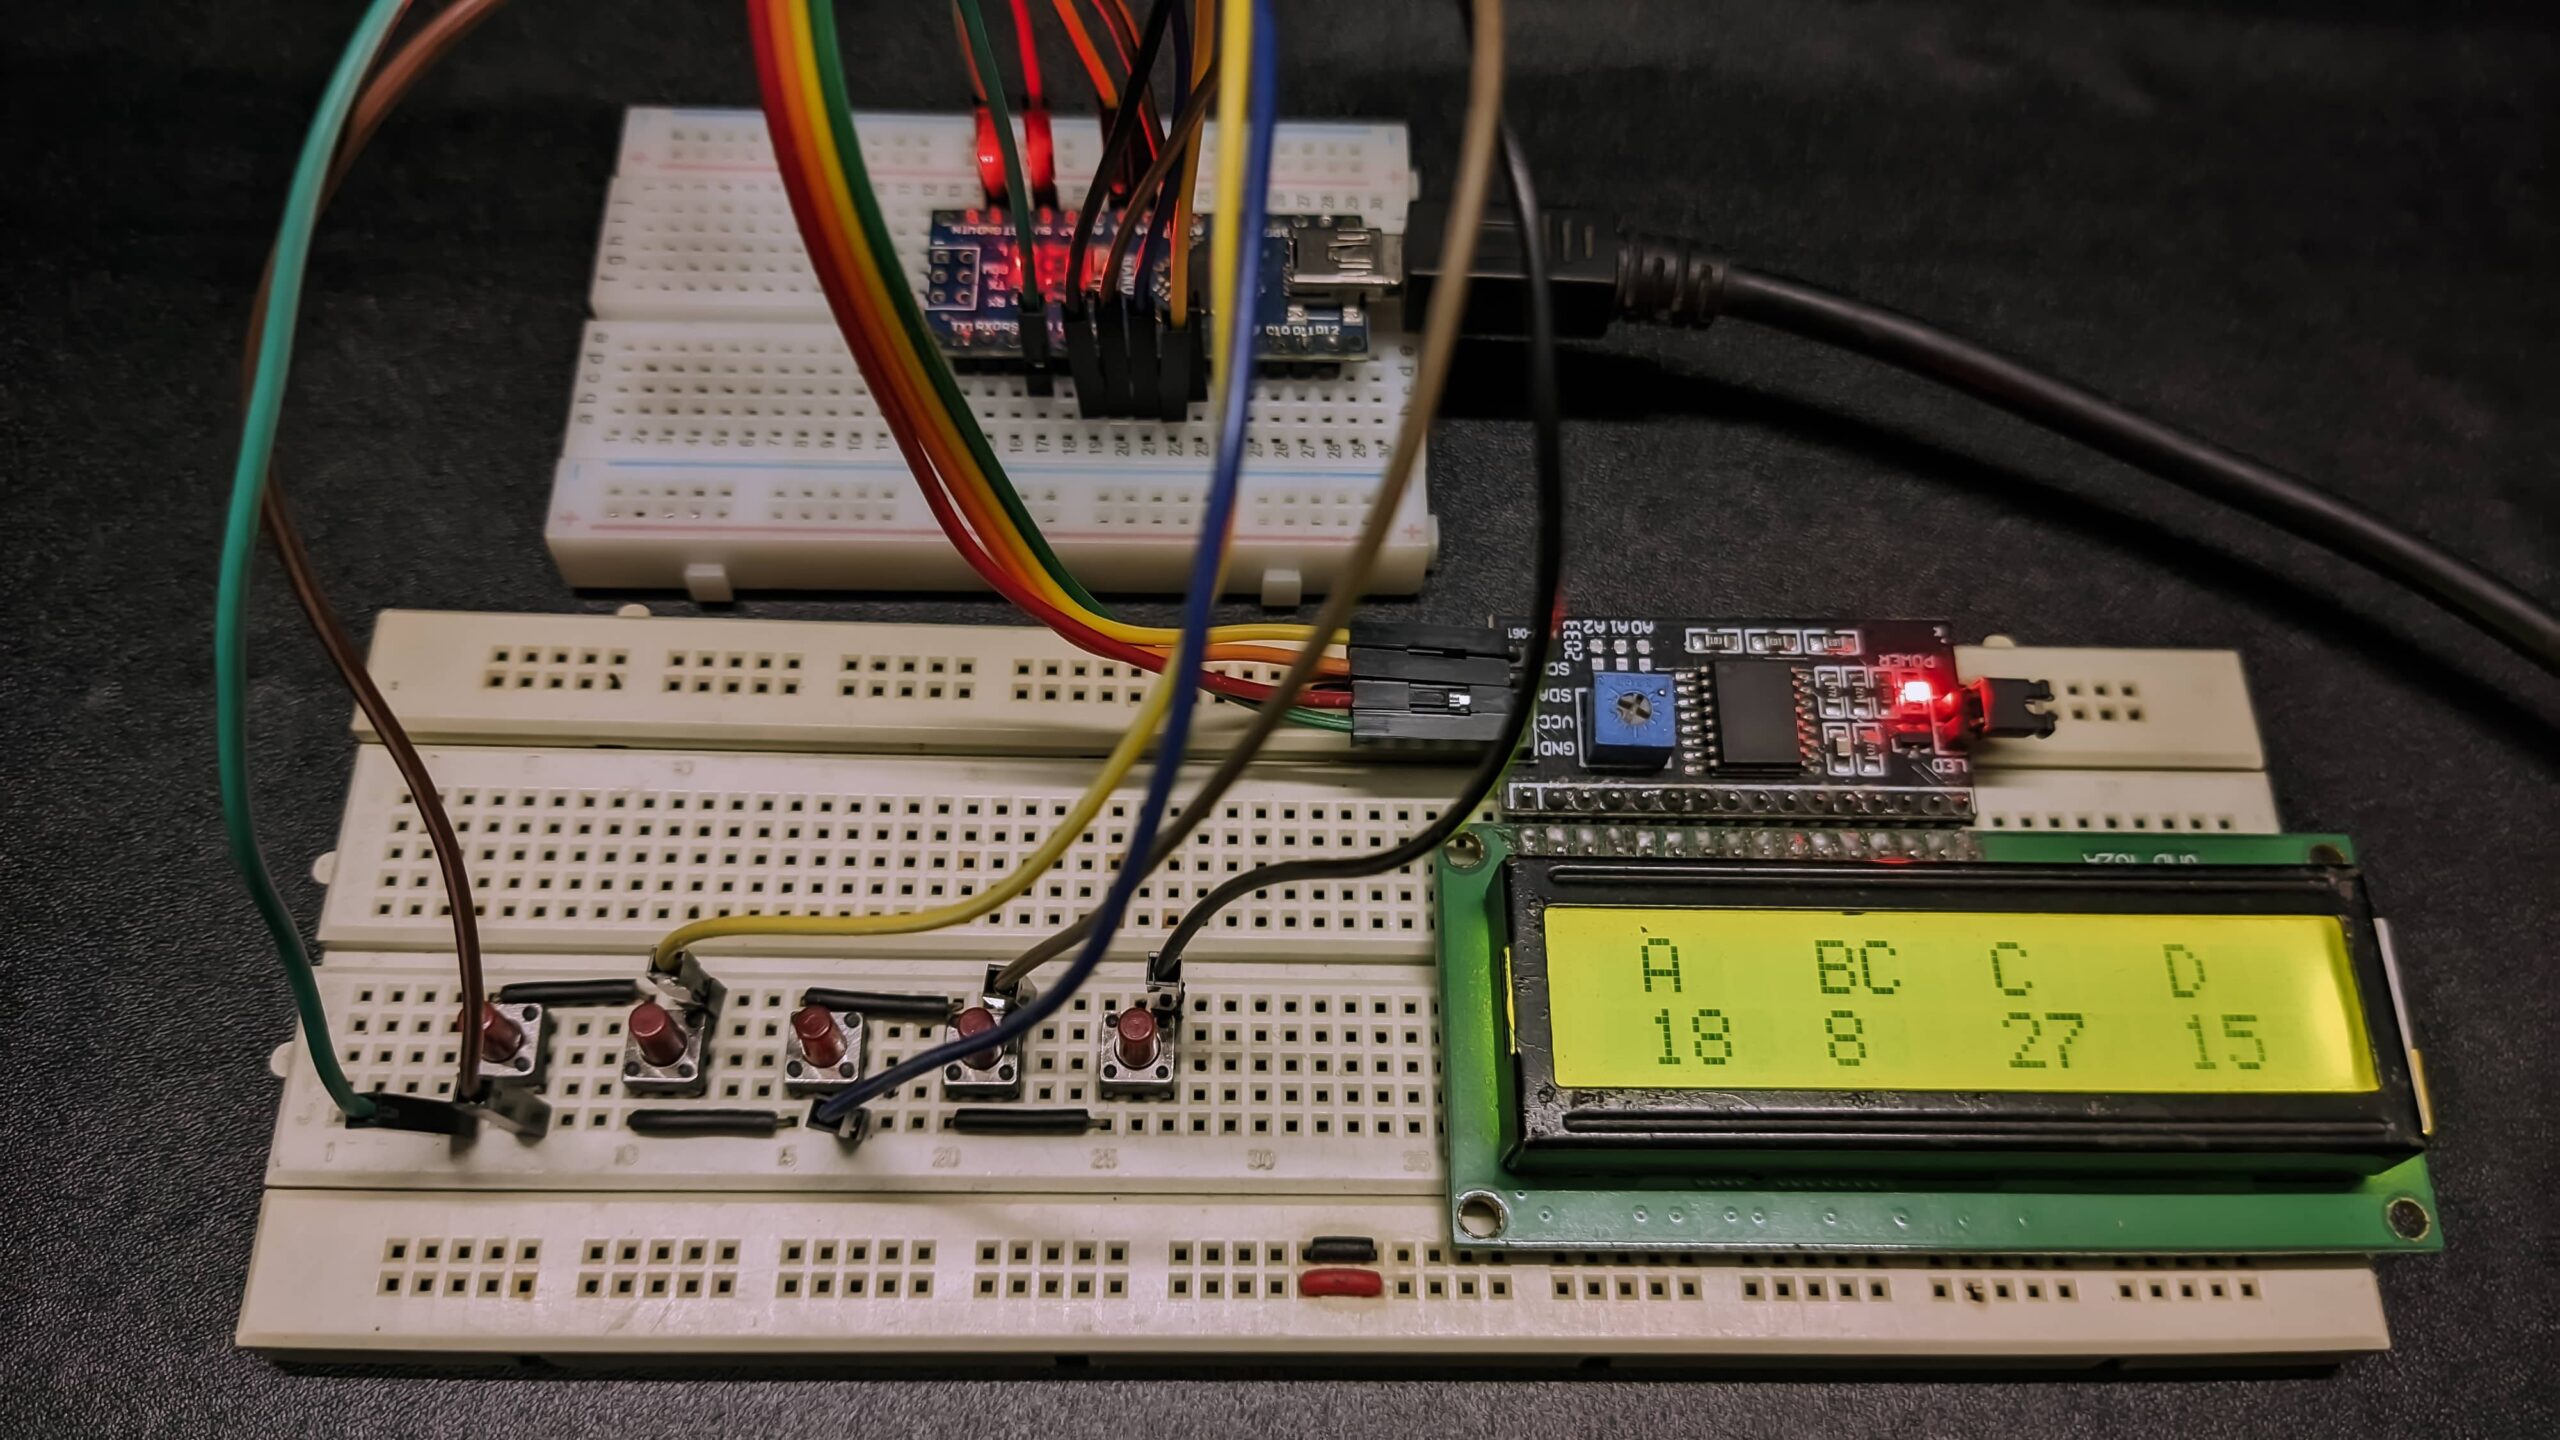
The device is integrated with a number of switches where A, B, C, D, and so on are the number of political parties. The voter will be allowed to choose their preferred candidate from the listed buttons. The final voting result will then be displayed on an LCD screen for the satisfaction of voters. Using the result button, the result will be automatically calculated.
Principle Behind The Electronic Voting Machine
In this project, we have used four push buttons for up to four political parties in the election. You can increase the number of candidates as per requirement. When anyone presses any of the four buttons the predefined respecting voting value will be increment by one each time. Rest of the voting process, we can see the final result by pressing the result button.
Project

Circuit Diagram

Components Required
- Arduino UNO
- 16×2 LCD Display
- I2C LCD Module
- Push Buttons (x5)
- Connection Wire
- Breadboard
- 5V Power Supply
Circuit Connection
| Arduino Pin | 16×2 LCD I2C Pin |
|---|---|
| A5 | SCL |
| A4 | SDA |
| 5V | VCC |
| GND | GND |
Working Principle of The Electronic Voting Machine
For the microcontroller, we chose the Arduino atmega328p microcontroller for our project. This is the heart and brain of this system. Arduino processes the complete voting process like reading the exact button, incrementing the value, generating a result, and sending the vote quantity and result to the LCD Display.
Here we have added five buttons that are assigned to candidate A, candidate B, candidate C, and candidate D, and the fifth button is used for calculating or displaying the result.
Arduino Code
To run and compile the below code you have to install this library to the Arduino IDE software.
#include <Wire.h>
#include <LiquidCrystal_I2C.h>
LiquidCrystal_I2C lcd(0x27, 16, 2);
#define S1 7
#define S2 6
#define S3 5
#define S4 4
#define S5 3
int vote1 = 0;
int vote2 = 0;
int vote3 = 0;
int vote4 = 0;
void setup()
{
  pinMode(S1, INPUT);
  pinMode(S2, INPUT);
  pinMode(S3, INPUT);
  pinMode(S4, INPUT);
  pinMode(S5, INPUT);
  lcd.init();
  lcd.backlight();
  lcd.print(" Smart Electronic ");
  lcd.setCursor(0, 1);
  lcd.print(" Voting Machine ");
  delay(4000);
  digitalWrite(S1, HIGH);
  digitalWrite(S2, HIGH);
  digitalWrite(S3, HIGH);
  digitalWrite(S4, HIGH);
  digitalWrite(S5, HIGH);
  lcd.clear();
  lcd.setCursor(1, 0);
  lcd.print("A");
  lcd.setCursor(5, 0);
  lcd.print("B");
  lcd.setCursor(9, 0);
  lcd.print("C");
  lcd.setCursor(13, 0);
  lcd.print("D");
}
void loop()
{
  lcd.setCursor(1, 0);
  lcd.print("A");
  lcd.setCursor(1, 1);
  lcd.print(vote1);
  lcd.setCursor(5, 0);
  lcd.print("B");
  lcd.setCursor(5, 1);
  lcd.print(vote2);
  lcd.setCursor(9, 0);
  lcd.print("C");
  lcd.setCursor(9, 1);
  lcd.print(vote3);
  lcd.setCursor(13, 0);
  lcd.print("D");
  lcd.setCursor(13, 1);
  lcd.print(vote4);
  if (digitalRead(S1) == 0)
    vote1++;
  while (digitalRead(S1) == 0);
  if (digitalRead(S2) == 0)
    vote2++;
  while (digitalRead(S2) == 0);
  if (digitalRead(S3) == 0)
    vote3++;
  while (digitalRead(S3) == 0);
  if (digitalRead(S4) == 0)
    vote4++;
  while (digitalRead(S4) == 0);
  if (digitalRead(S5) == 0)
  {
    int vote = vote1 + vote2 + vote3 + vote4;
    if (vote)
    {
      if ((vote1 > vote2 && vote1 > vote3 && vote1 > vote4))
      {
        lcd.clear();
        lcd.print("A is Winner");
        delay(3000);
        lcd.clear();
      }
      else if ((vote2 > vote1 && vote2 > vote3 && vote2 > vote4))
      {
        lcd.clear();
        lcd.print("B is Winner");
        delay(3000);
        lcd.clear();
      }
      else if ((vote3 > vote1 && vote3 > vote2 && vote3 > vote4))
      {
        lcd.clear();
        lcd.print("C is Winner");
        delay(3000);
        lcd.clear();
      }
      else if (vote4 > vote1 && vote4 > vote2 && vote4 > vote3)
      {
        lcd.setCursor(0, 0);
        lcd.clear();
        lcd.print("D is Winner");
        delay(3000);
        lcd.clear();
      }
      else if (vote4 > vote1 && vote4 > vote2 && vote4 > vote3)
      {
        lcd.setCursor(0, 0);
        lcd.clear();
        lcd.print("D is Winner");
        delay(3000);
        lcd.clear();
      }
      else
      {
        lcd.clear();
        lcd.print(" Tie Up Or ");
        lcd.setCursor(0, 1);
        lcd.print(" No Result ");
        delay(3000);
        lcd.clear();
      }
    }
    else
    {
      lcd.clear();
      lcd.print("No Voting....");
      delay(3000);
      lcd.clear();
    }
    vote1 = 0; vote2 = 0; vote3 = 0; vote4 = 0, vote = 0;
    lcd.clear();
  }
}